SkyrimNet is a rarity among the mods in Mad God’s Overhaul in that it does require a bit of setup, but it walks you through the whole thing with a setup wizard. This page follows one path through that wizard from start to finish.
Two things to know going in:
- SkyrimNet is optional and disabled by default. Enable it (and its plugins) in MO2’s OPTIONAL Mods → AI and Speech section.
- SkyrimNet needs an AI provider, and the good ones cost money. SkyrimNet itself is free, but many of the LLMs (large language models) that that it can talk to cost money. It’s pay-as-you-go, and you can easily set a limit. About $10 of credit is plenty to get started.
What about the plugins?
Opening the dashboard
Everything happens in SkyrimNet’s dashboard, a web interface that you can access once the game is running with SkyrimNet enabled. Visit http://localhost:8080 in a web browser on the PC where Skyrim VR is running.
The first time you open it, SkyrimNet walks you through the setup wizard. Move through it with the Back and Next buttons. Everything you configure here can be changed later from the dashboard, so don’t worry too much. You can even run through the entire wizard again later.
The wizard opens with a welcome, a link to the SkyrimNet Discord (well worth joining for help), and a sign in screen. Account-based setup isn’t available yet, so choose Manual setup to continue.
Choose an AI provider
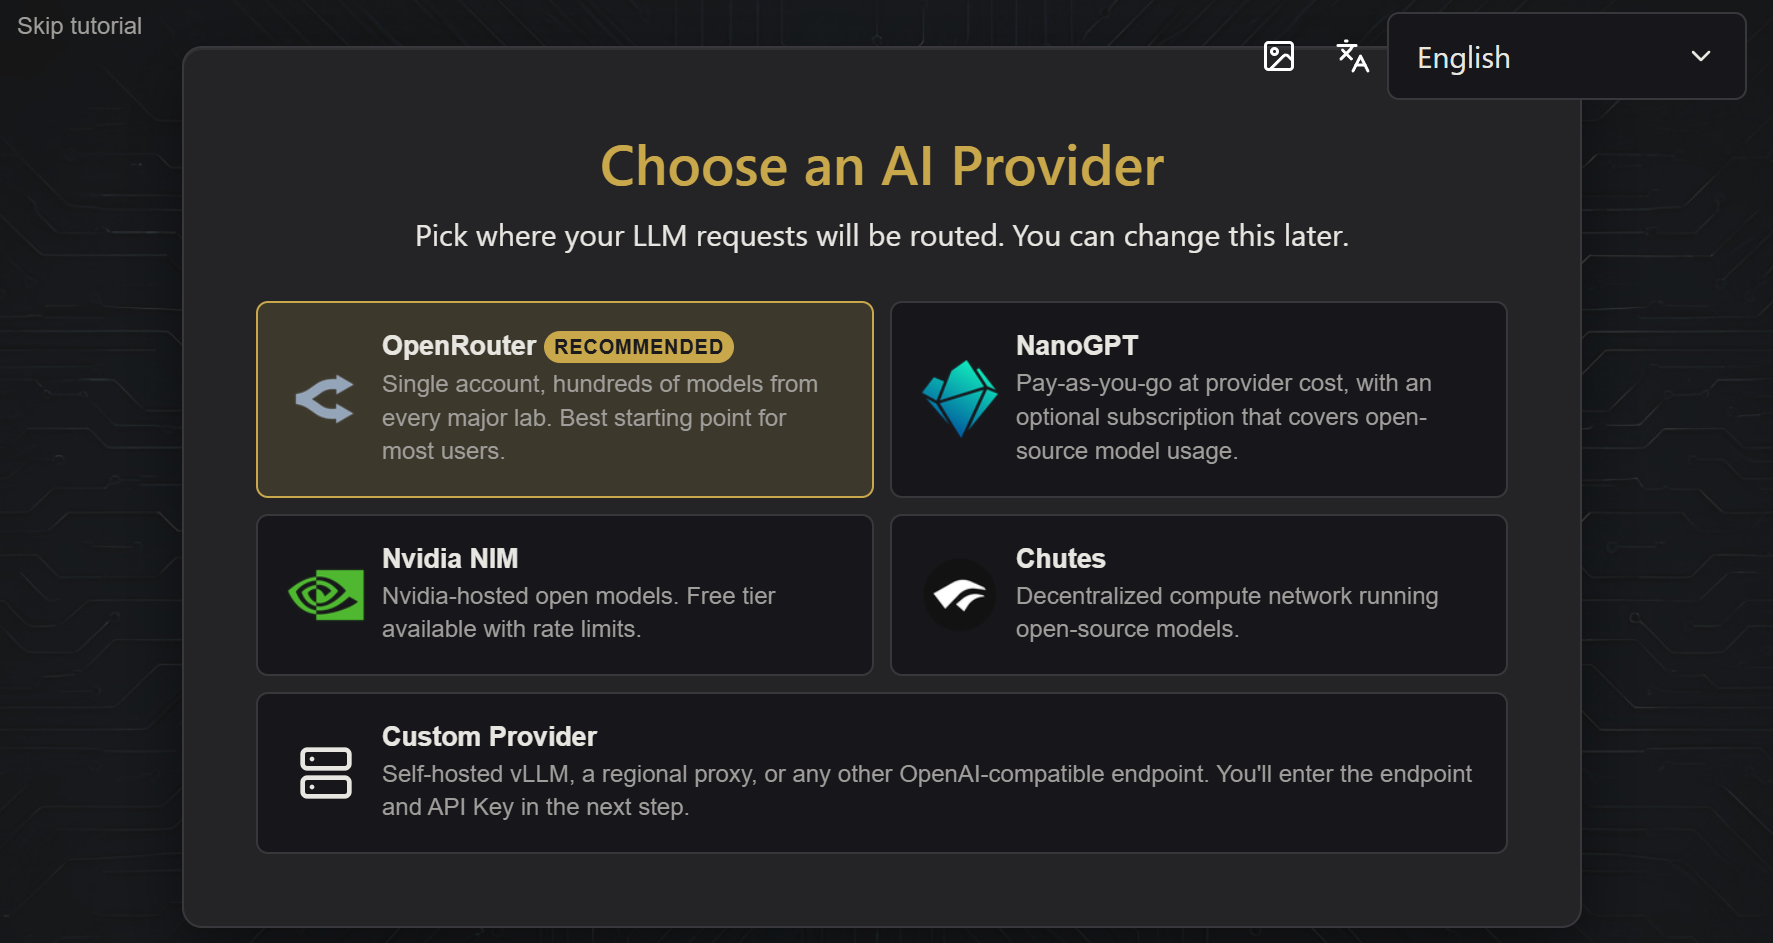
Your provider is the service that runs the language models. SkyrimNet offers a few:
- OpenRouter (recommended) gives you one account with access to hundreds of models from every major lab. It’s the best starting point.
- NanoGPT, Nvidia NIM, and Chutes are alternatives, each with its own pricing and model selection.
- Custom Provider lets you point at a self-hosted or OpenAI-compatible endpoint, if you know you need one.
The rest of this page assumes OpenRouter. Remember, you can change your provider later.
Set up OpenRouter
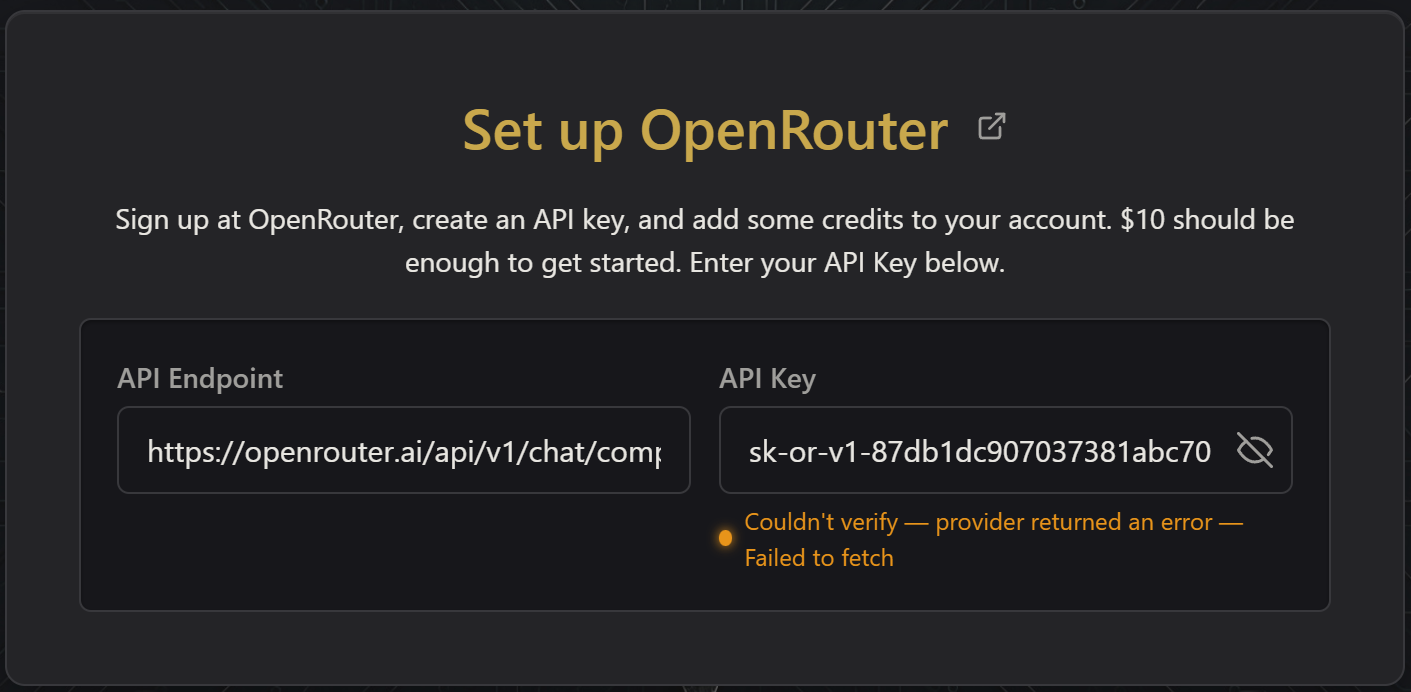
Head to OpenRouter , create an account, and add a little credit (about $10 to start). Then create an API key and copy it. Back in the wizard, the API Endpoint is already filled in, so just paste your key into the API Key field. SkyrimNet checks the key as you go: a valid key shows a confirmation, while a bad key (or one with no credit) shows an error.
Save that key somewhere
Choose your models
SkyrimNet uses language models for a whole range of jobs (dialogue, memories, combat decisions, and more). Rather than pick one for each, start with a preset:
- Budget keeps costs down and responses quick.
- Balanced is the sweet spot for most players, and a great place to start.
- Premium leans on stronger (pricier) models.
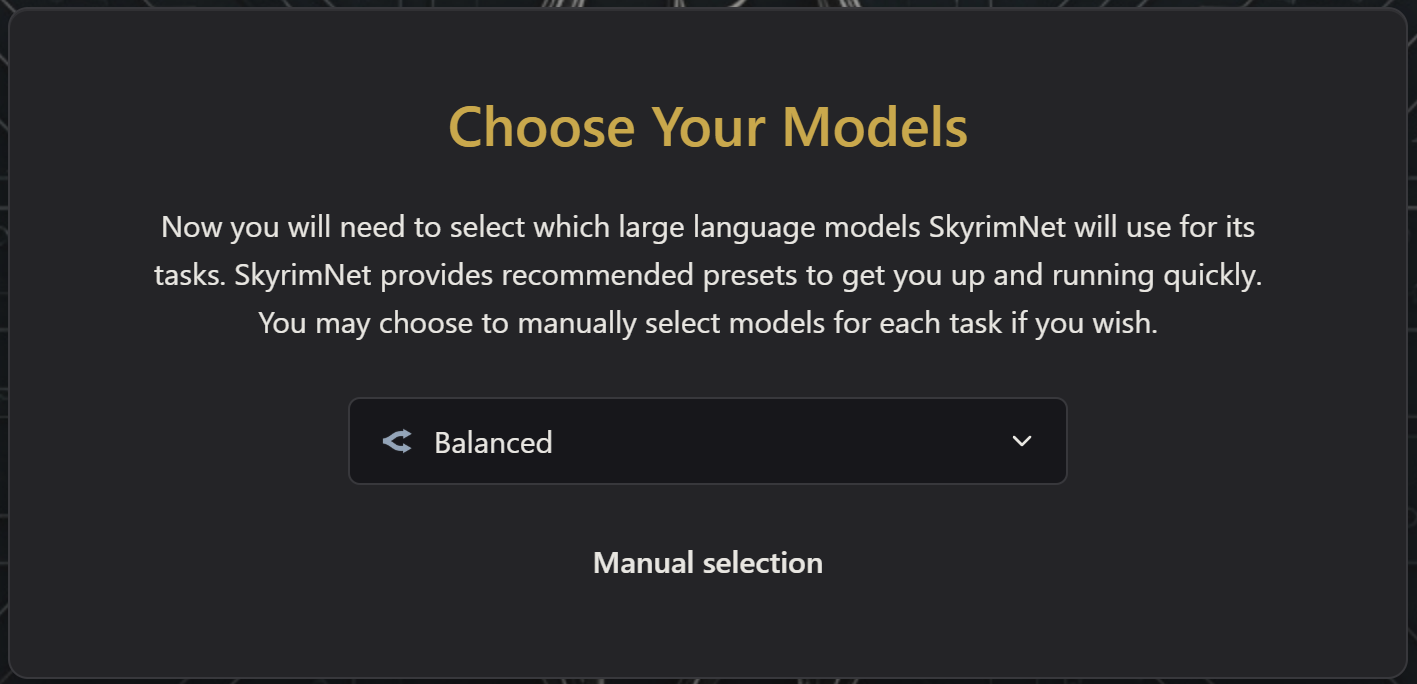
Manual selection lets you assign a specific model to each task, if you’re not in a hurry and you know what you’re doing.
Test your models
Next, the wizard runs a quick check across every task (dialogue, character profiles, memory, combat, etc.) to confirm your provider and models are all responding. Give it a moment. A row of green checks means you’re good to move on. If something fails, you might be missing credit on the API key you configured.
Choose a text-to-speech engine
This is how NPCs actually speak their lines aloud. There are several engines, trading off quality, speed, cost, and hardware:
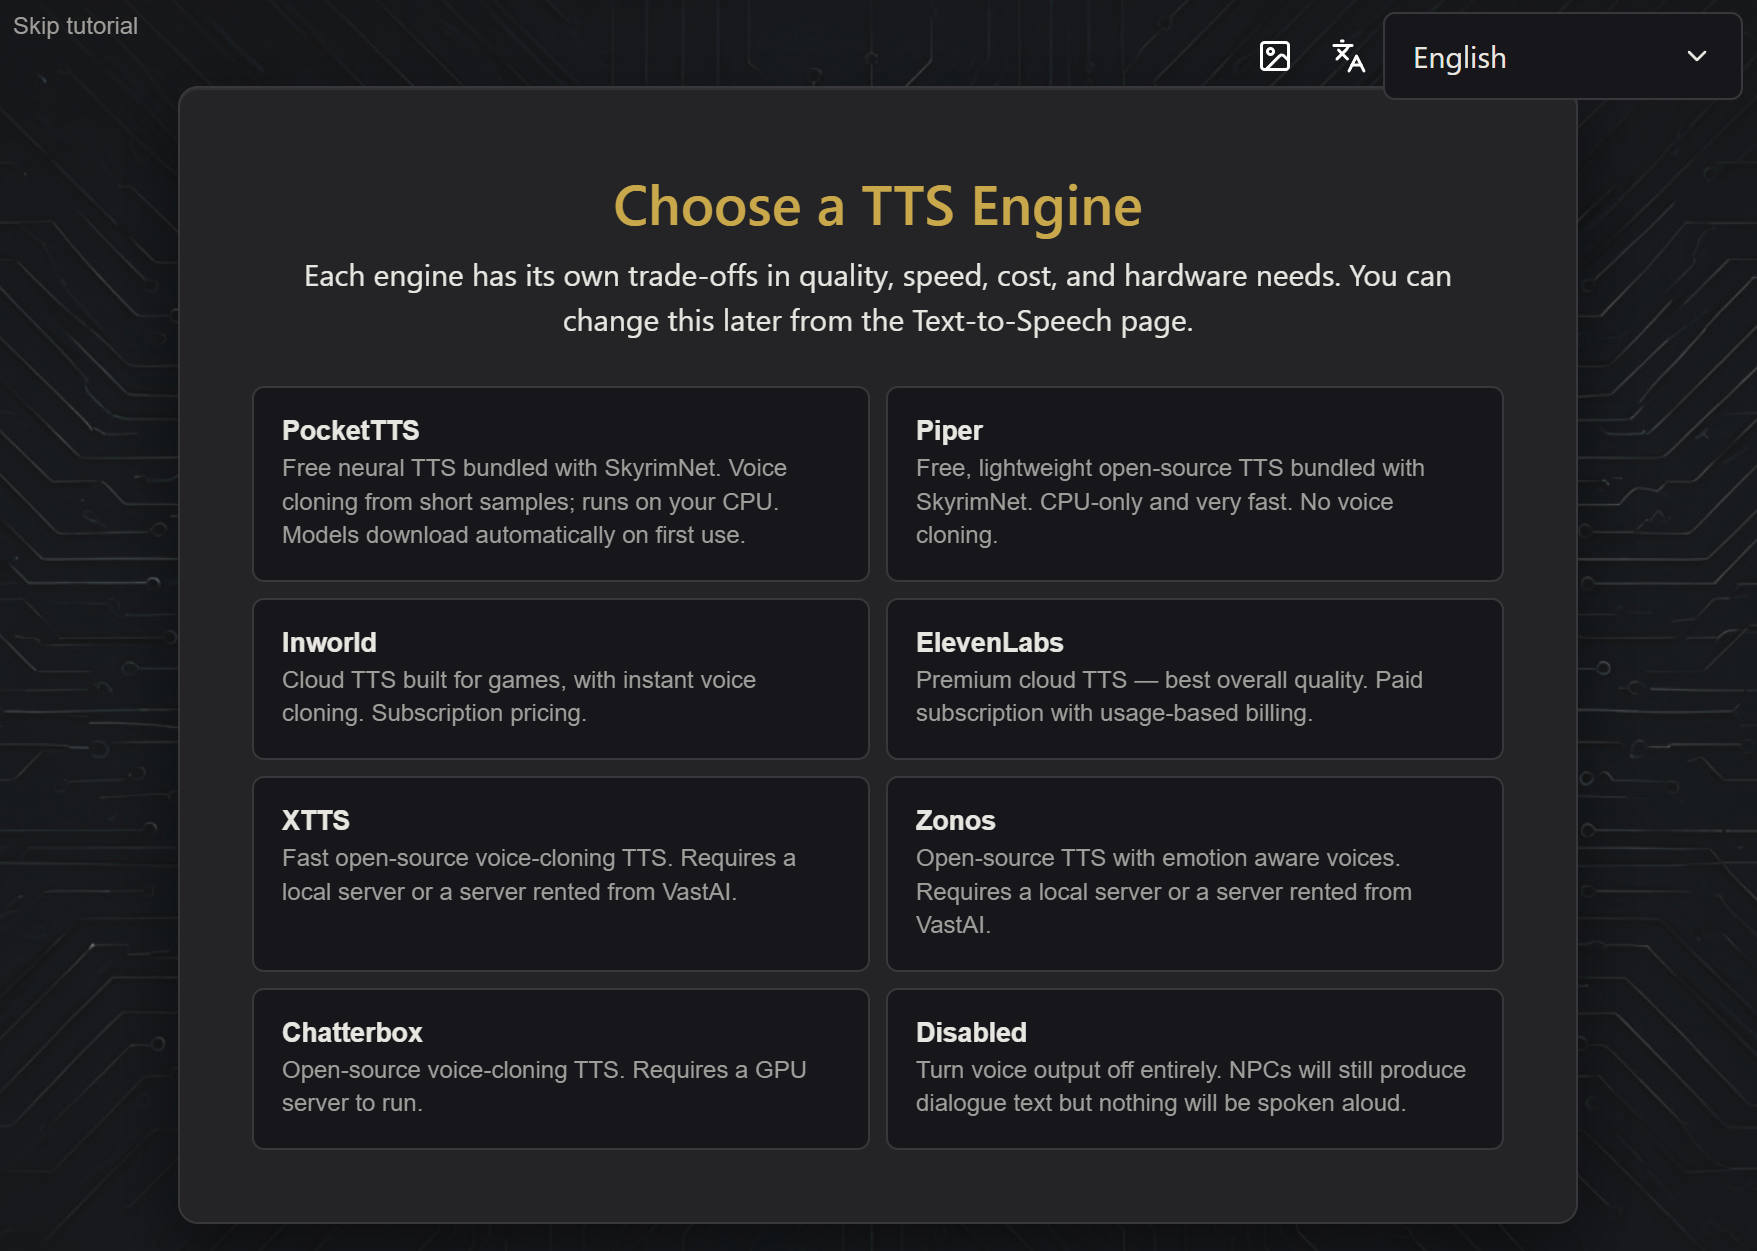
- PocketTTS is bundled with SkyrimNet, runs on your CPU, and can clone voices from short samples. It’s a strong free starting point, and its models download automatically the first time you use it.
- Piper is also bundled, extremely fast, and CPU-only, but it doesn’t do voice cloning.
- Inworld and ElevenLabs are paid cloud services. (ElevenLabs has the best quality of the bunch.)
- XTTS, Zonos, and Chatterbox are open-source voice-cloning engines that need a local or rented GPU server.
- Disabled turns voice synthesis off entirely. NPCs still show their dialogue as text.
If you pick PocketTTS, there’s nothing to configure, although an Advanced section is there if you want to adjust quality and performance. SkyrimNet then downloads the voice models (a one-time wait), and a Test Your Voice step lets you type a line and hear it spoken to confirm everything works.
Set up your microphone
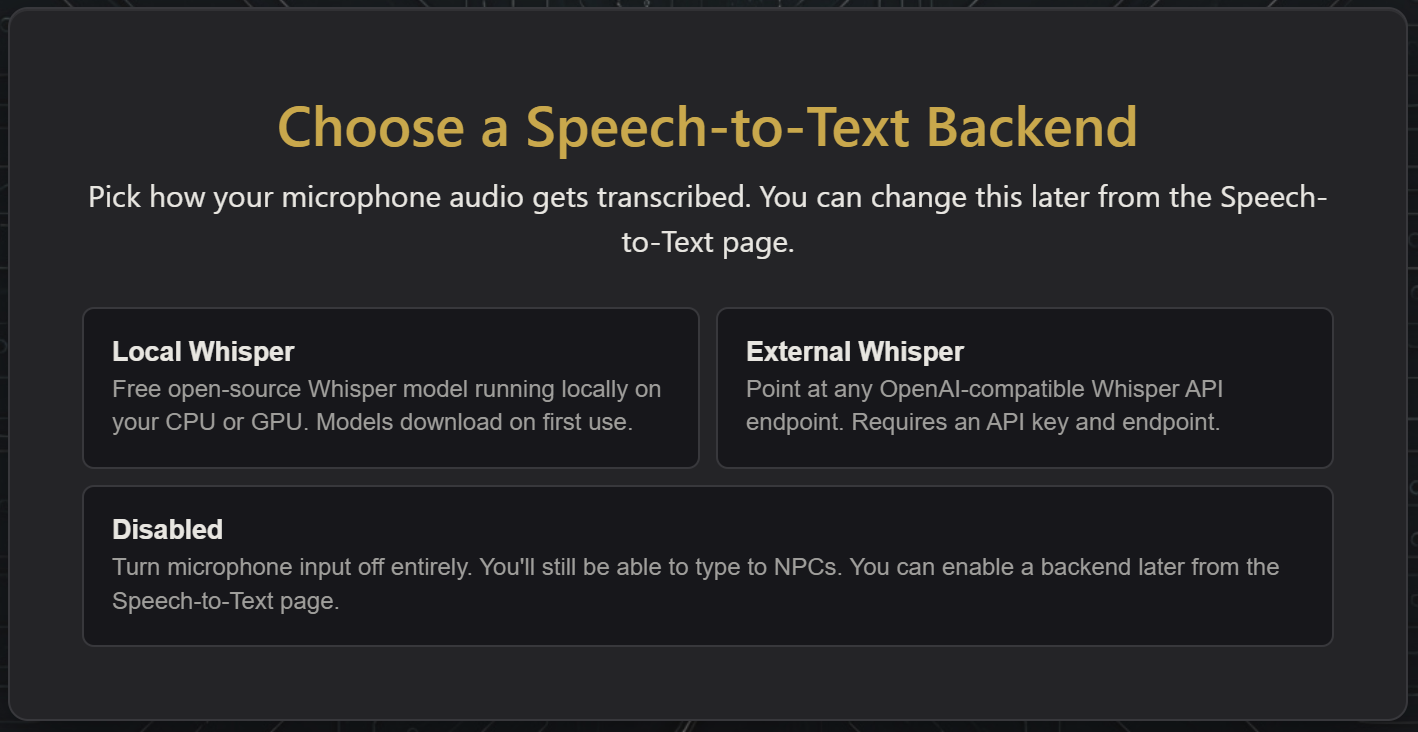
Listening is nice and all, but I bet you want to talk too.
- Local Whisper runs a free, open-source speech model on your own machine (CPU or GPU).
- External Whisper points at an OpenAI-compatible Whisper API (needs an endpoint and key).
- Disabled skips voice input. You can still type to NPCs.
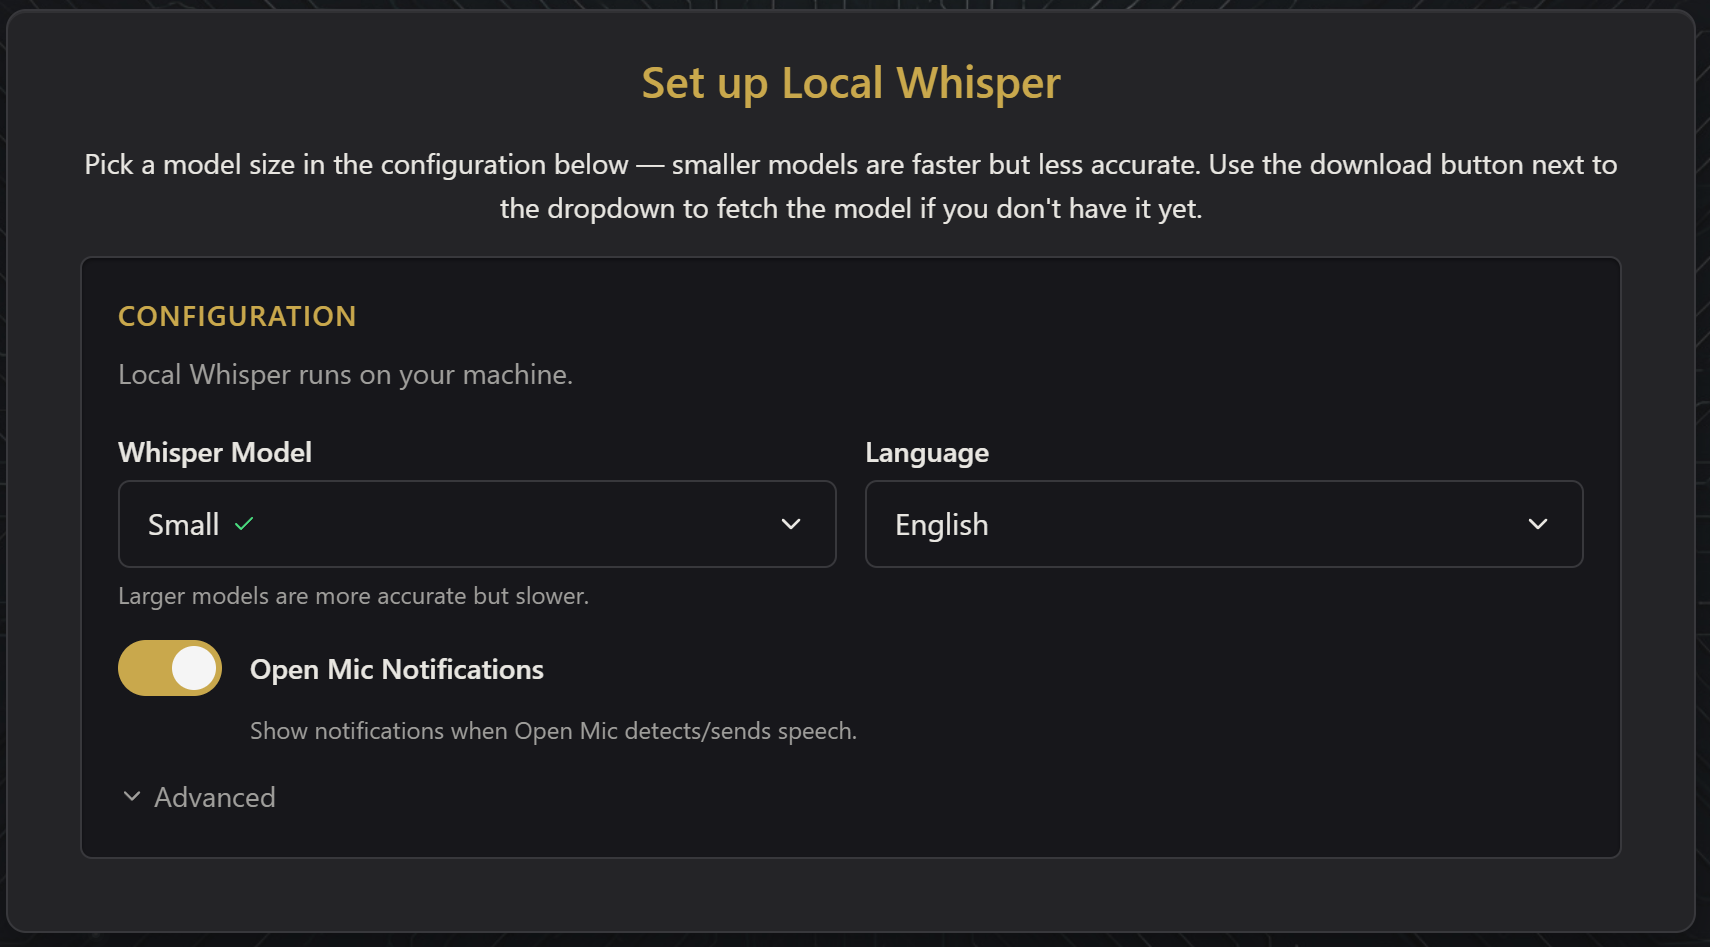
For Local Whisper, pick a Whisper Model size. Smaller models are faster. Larger ones are more accurate, but slower. Use the download button next to the dropdown to fetch the model if you don’t have it yet. If you have an NVIDIA GPU with CUDA support, you can install CUDA Toolkit and turn on GPU Acceleration on the Advanced tab. A Test Your Microphone step then lets you record a few seconds and check the transcription.
Hotkeys
SkyrimNet leans on hotkeys for things like opening the chat input, push-to-talk, and opening the dashboard. The wizard shows you the current bindings and lets you rebind or clear any of them. Not all are required, so set only the ones you’ll actually use. You’ll probably at least want one for Voice Input (Push to Talk).
Player options
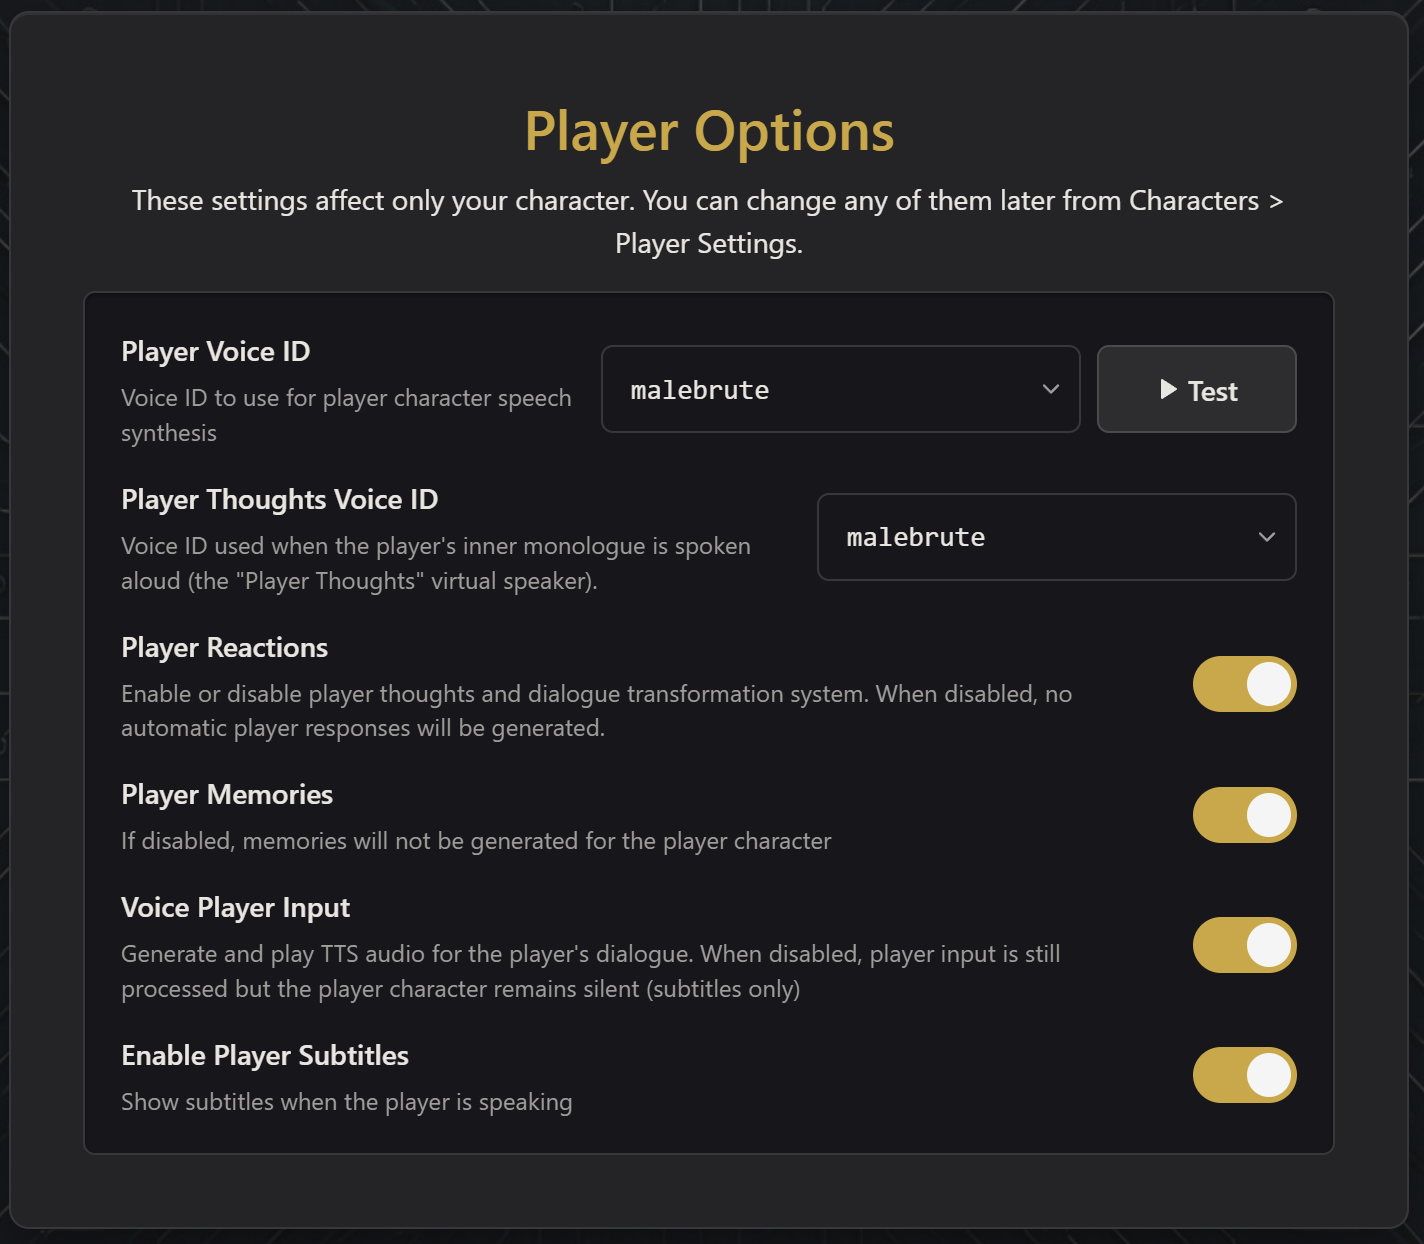
These settings apply to you, the player:
- Player Voice ID and Player Thoughts Voice ID set the voices for your character’s speech and inner monologue.
- Player Reactions lets your character generate their own thoughts and dialogue.
- Player Memories decides whether the world remembers what you do.
- Voice Player Input speaks your dialogue aloud (turn it off for subtitles only).
- Enable Player Subtitles shows subtitles when you speak.
You can change any of these later from Characters → Player Settings.
Write your character bio
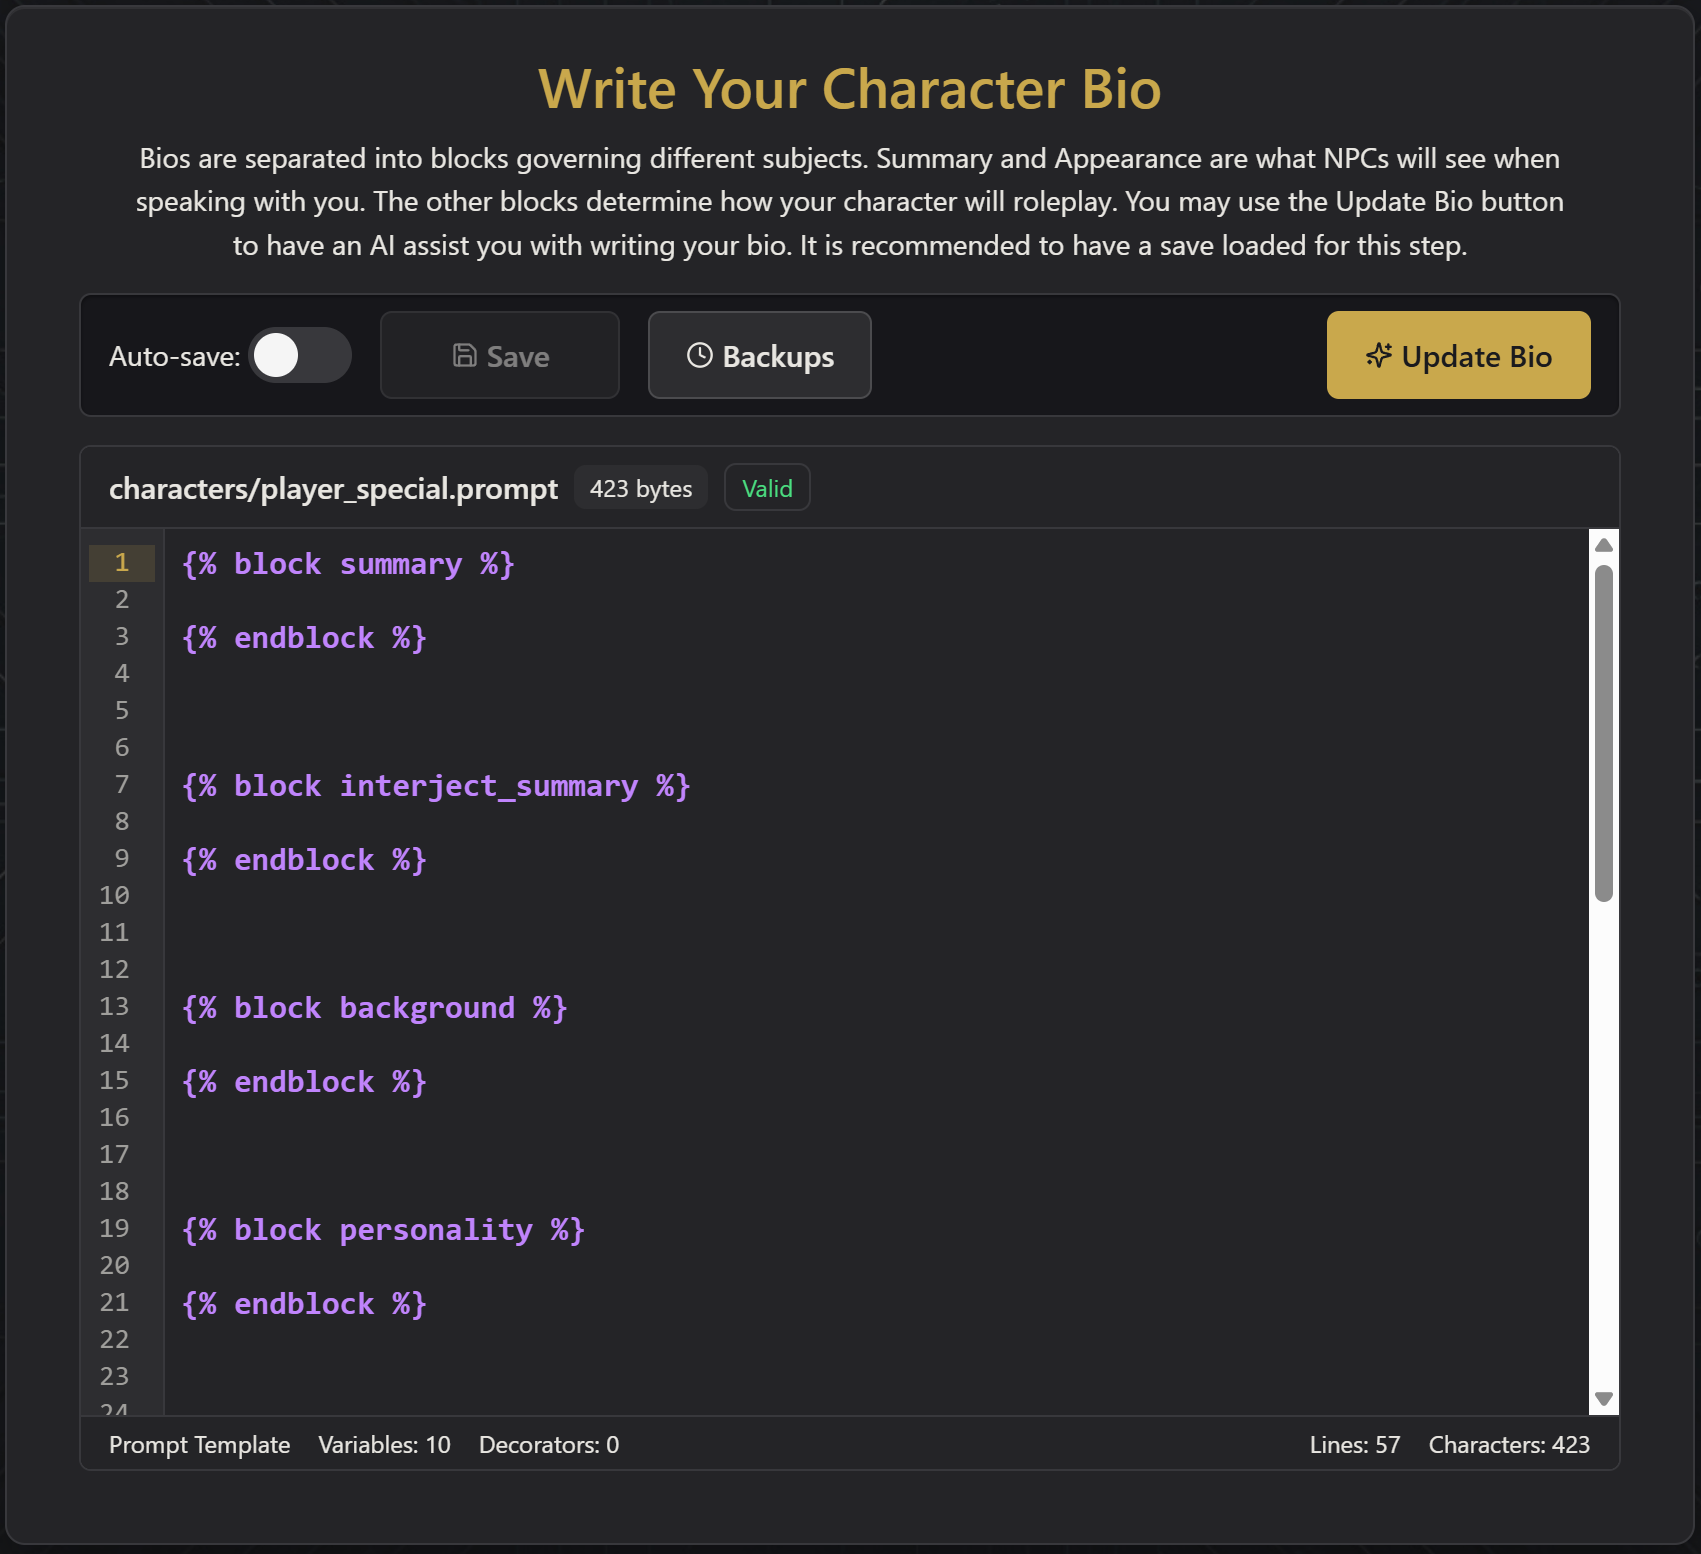
Last, SkyrimNet wants to know who your character is. The bio is split into blocks: Summary and Appearance are what NPCs perceive when they meet you, while the others shape how your character role-plays. If you’d rather not write it all yourself, use the Update Bio button to have AI draft one for you. It works best with a save loaded, so the AI has a character to describe.
You’re ready to play
That’s it. The wizard shows a final checklist (provider and models, TTS, speech-to-text, hotkeys, and your player options and bio) and a Finish button. There’s much more to explore in the dashboard when you’re ready, but this is enough to start talking to the people of Skyrim.