Windows 11 has made it outrageously convoluted to reach its virtual memory (also called a page file) settings.
Without screenshots…
- Open Settings .
- Choose System on the left.
- Scroll to the very bottom and click About .
- Scroll down to the row of links that appears after “Device specifications”, and click Advanced system settings .
- In the Performance section on the Advanced tab in the System Properties window, click Settings… .
- In the Virtual memory section of the Advanced tab of the Performance Options window, click Change… .
- With your fastest NVMe drive highlighted1, click
Custom size
and enter
90000(if you have 32 GB of system memory) or70000(if you have 64 GB of system memory) as both the Initial size and the Maximum size. (You will need to keep that much space free on this drive to take advantage of this.) - Be sure to click the Set button before clicking OK and closing all of these windows.
You will be prompted to restart your computer.
With screenshots…
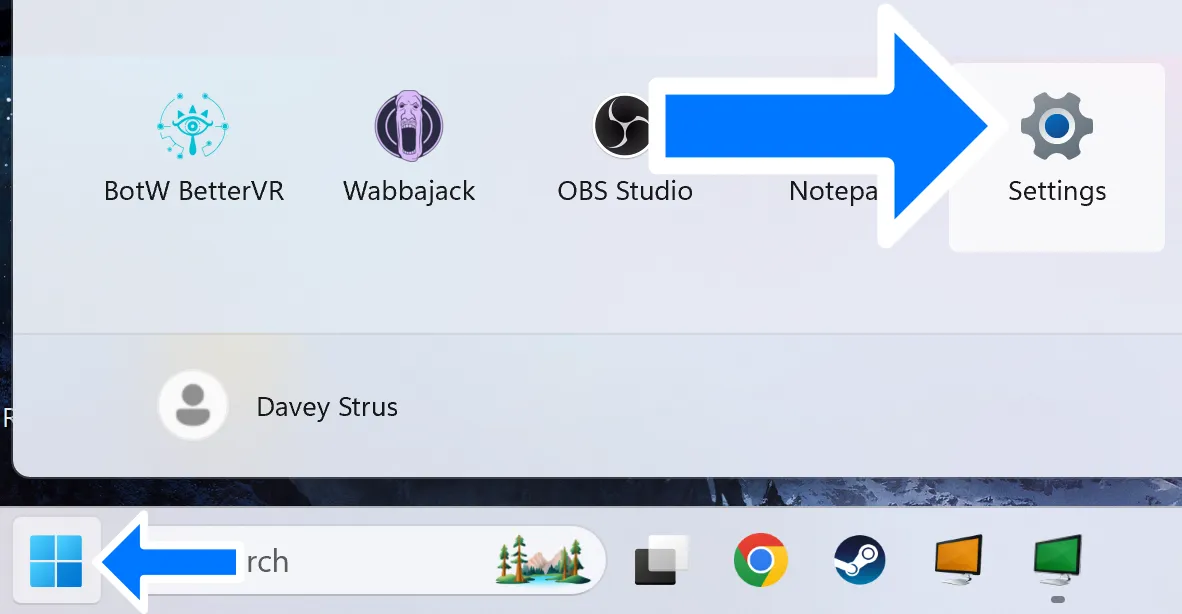
Step 1: Open
Settings
with a shortcut or with + I.
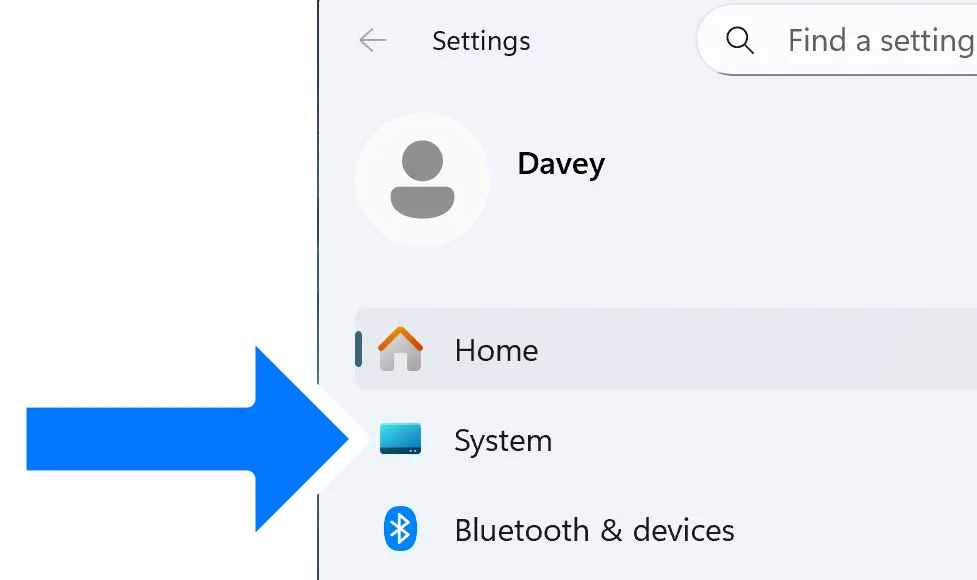
Step 2: Choose System on the left.
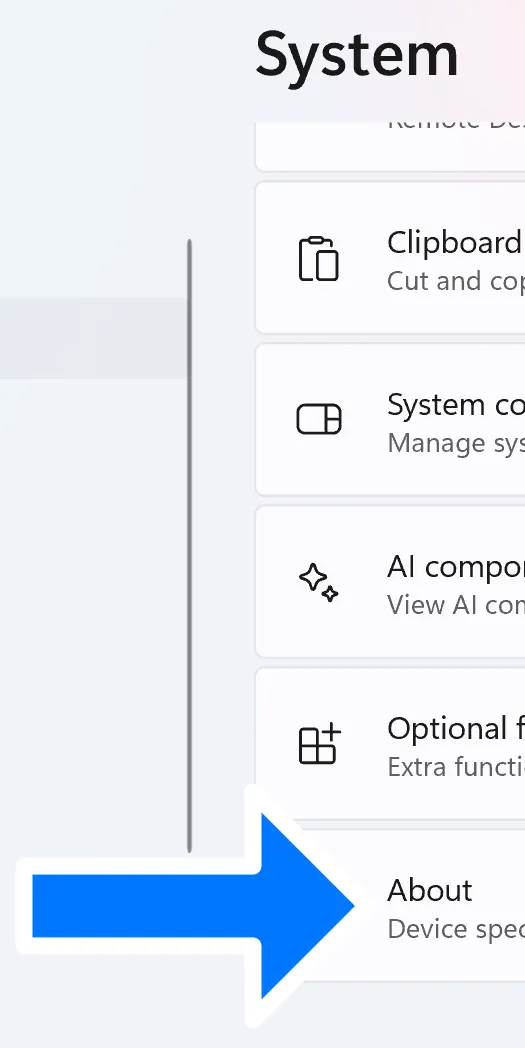
Step 2: Scroll to the very bottom and click About
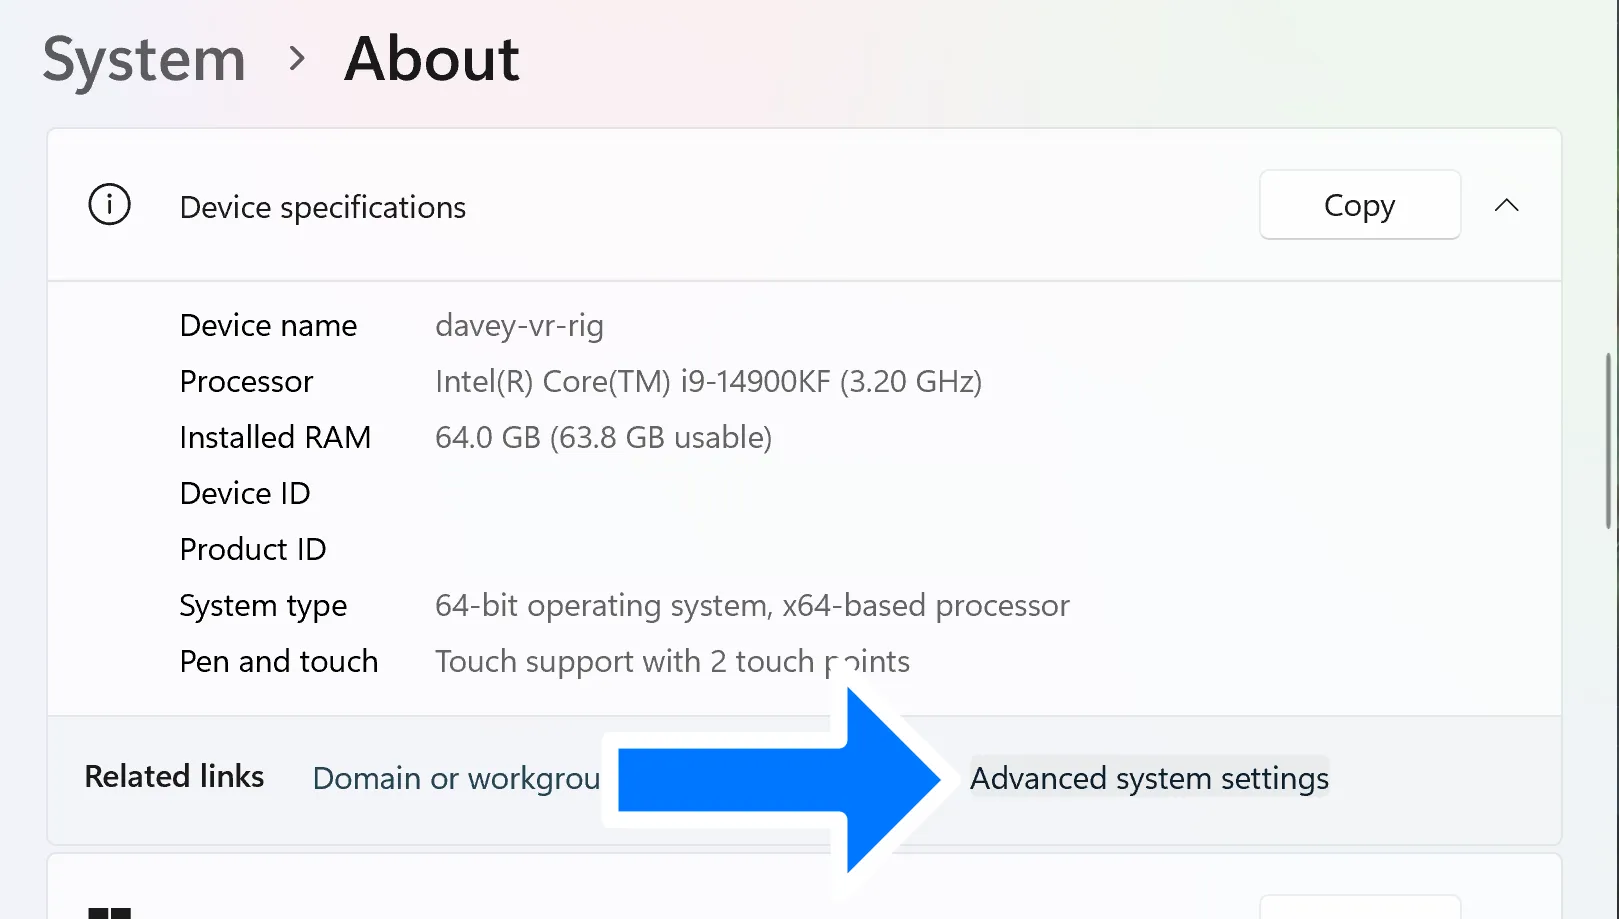
Step 4: Scroll down to the row of links that appears after “Device specifications”, and click Advanced system settings.
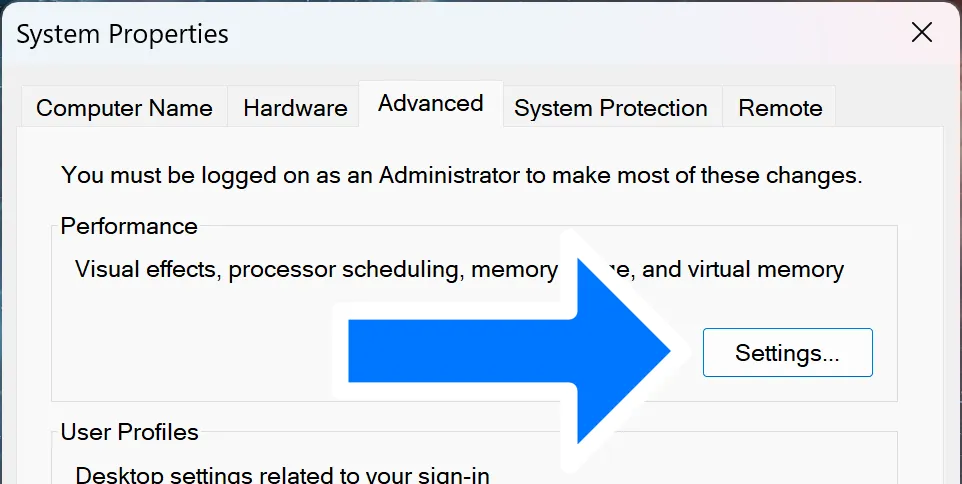
Step 5: In the Performance section on the Advanced tab in the System Properties window, click Settings….
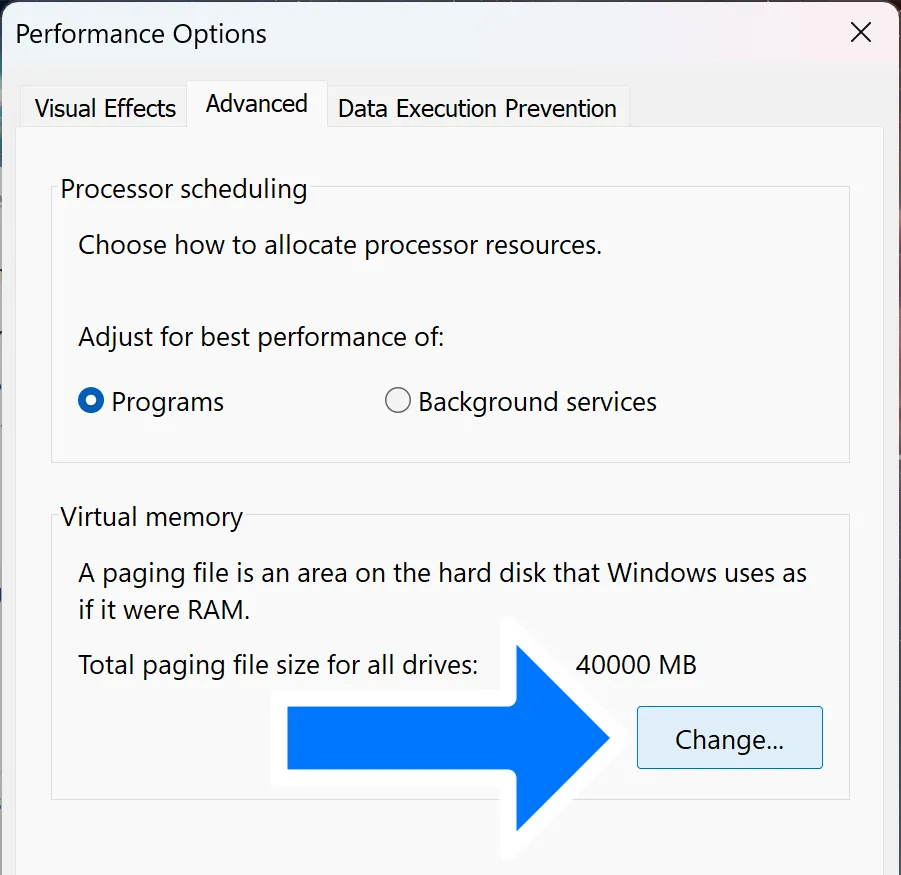
Step 6: In the Virtual memory section of the Advanced tab of the Performance Options window, click Change….
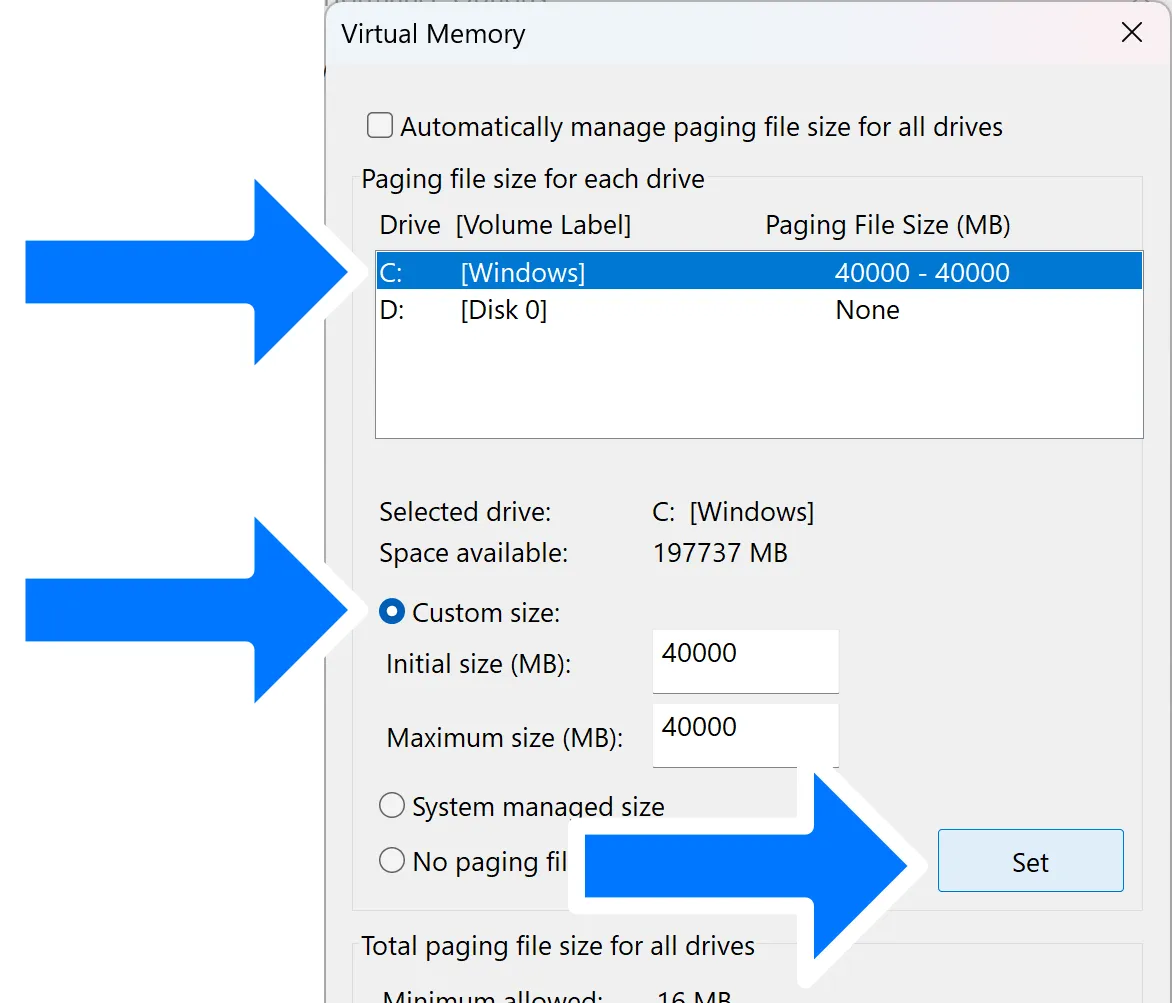
Step 7: With your NVMe drive highlighted, click Custom size and enter 40000 as both the Initial size and the Maximum size. (You will need to keep 40 GB free on this drive to take advantage of this.)
Step 8: Be sure to click the Set button before clicking OK and closing all of these windows.
You will be prompted to restart your computer.
It doesn’t necessarily need to be the drive where MGO is installed—just whatever disk is fastest. ↩︎