Tip of the Daedric Helmet
Skyrim VR was built to run through SteamVR. For a lot of setups (anything going through Virtual Desktop, Quest Link, and the like), that means an extra translation layer sitting between the game and your headset. OpenComposite Unleashed (OCU) saves that step, and it’s enabled by default in MGO.
OCU works well even for SteamVR-native headsets (i.e. ones that require base stations), and though the inherent performance improvement in that setup isn’t as dramatic, it provides other benefits that you’ll likely find to be worth it. If you don’t use any SteamVR accessories like trackers or a treadmill, then you’ll probably want to take advantage of what OCU offers.
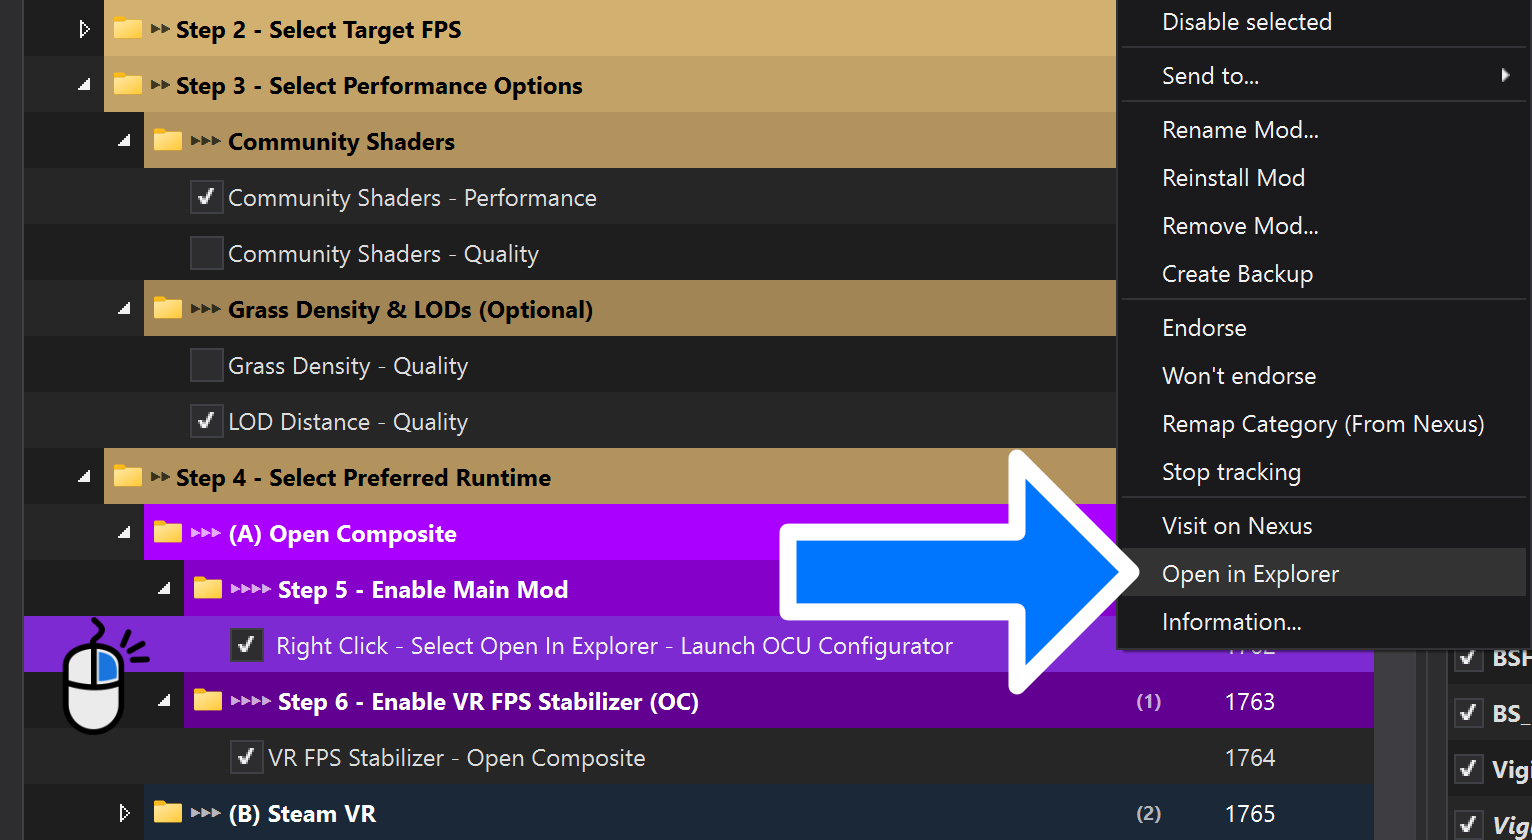
OCU includes a desktop app, OC Unleashed Configurator for Skyrim VR.exe (hereafter called the Configurator), that unlocks a bunch of things Skyrim VR never shipped with. You’ll find the app in the OCU mod folder. To open the mod folder, find the MO2 entry Right Click - Select Open In Explorer - Launch OCU Configurator , do what it says, and then make a shortcut for the app so you don’t have to do all of that every time you want to tweak something.
Set Your Runtime
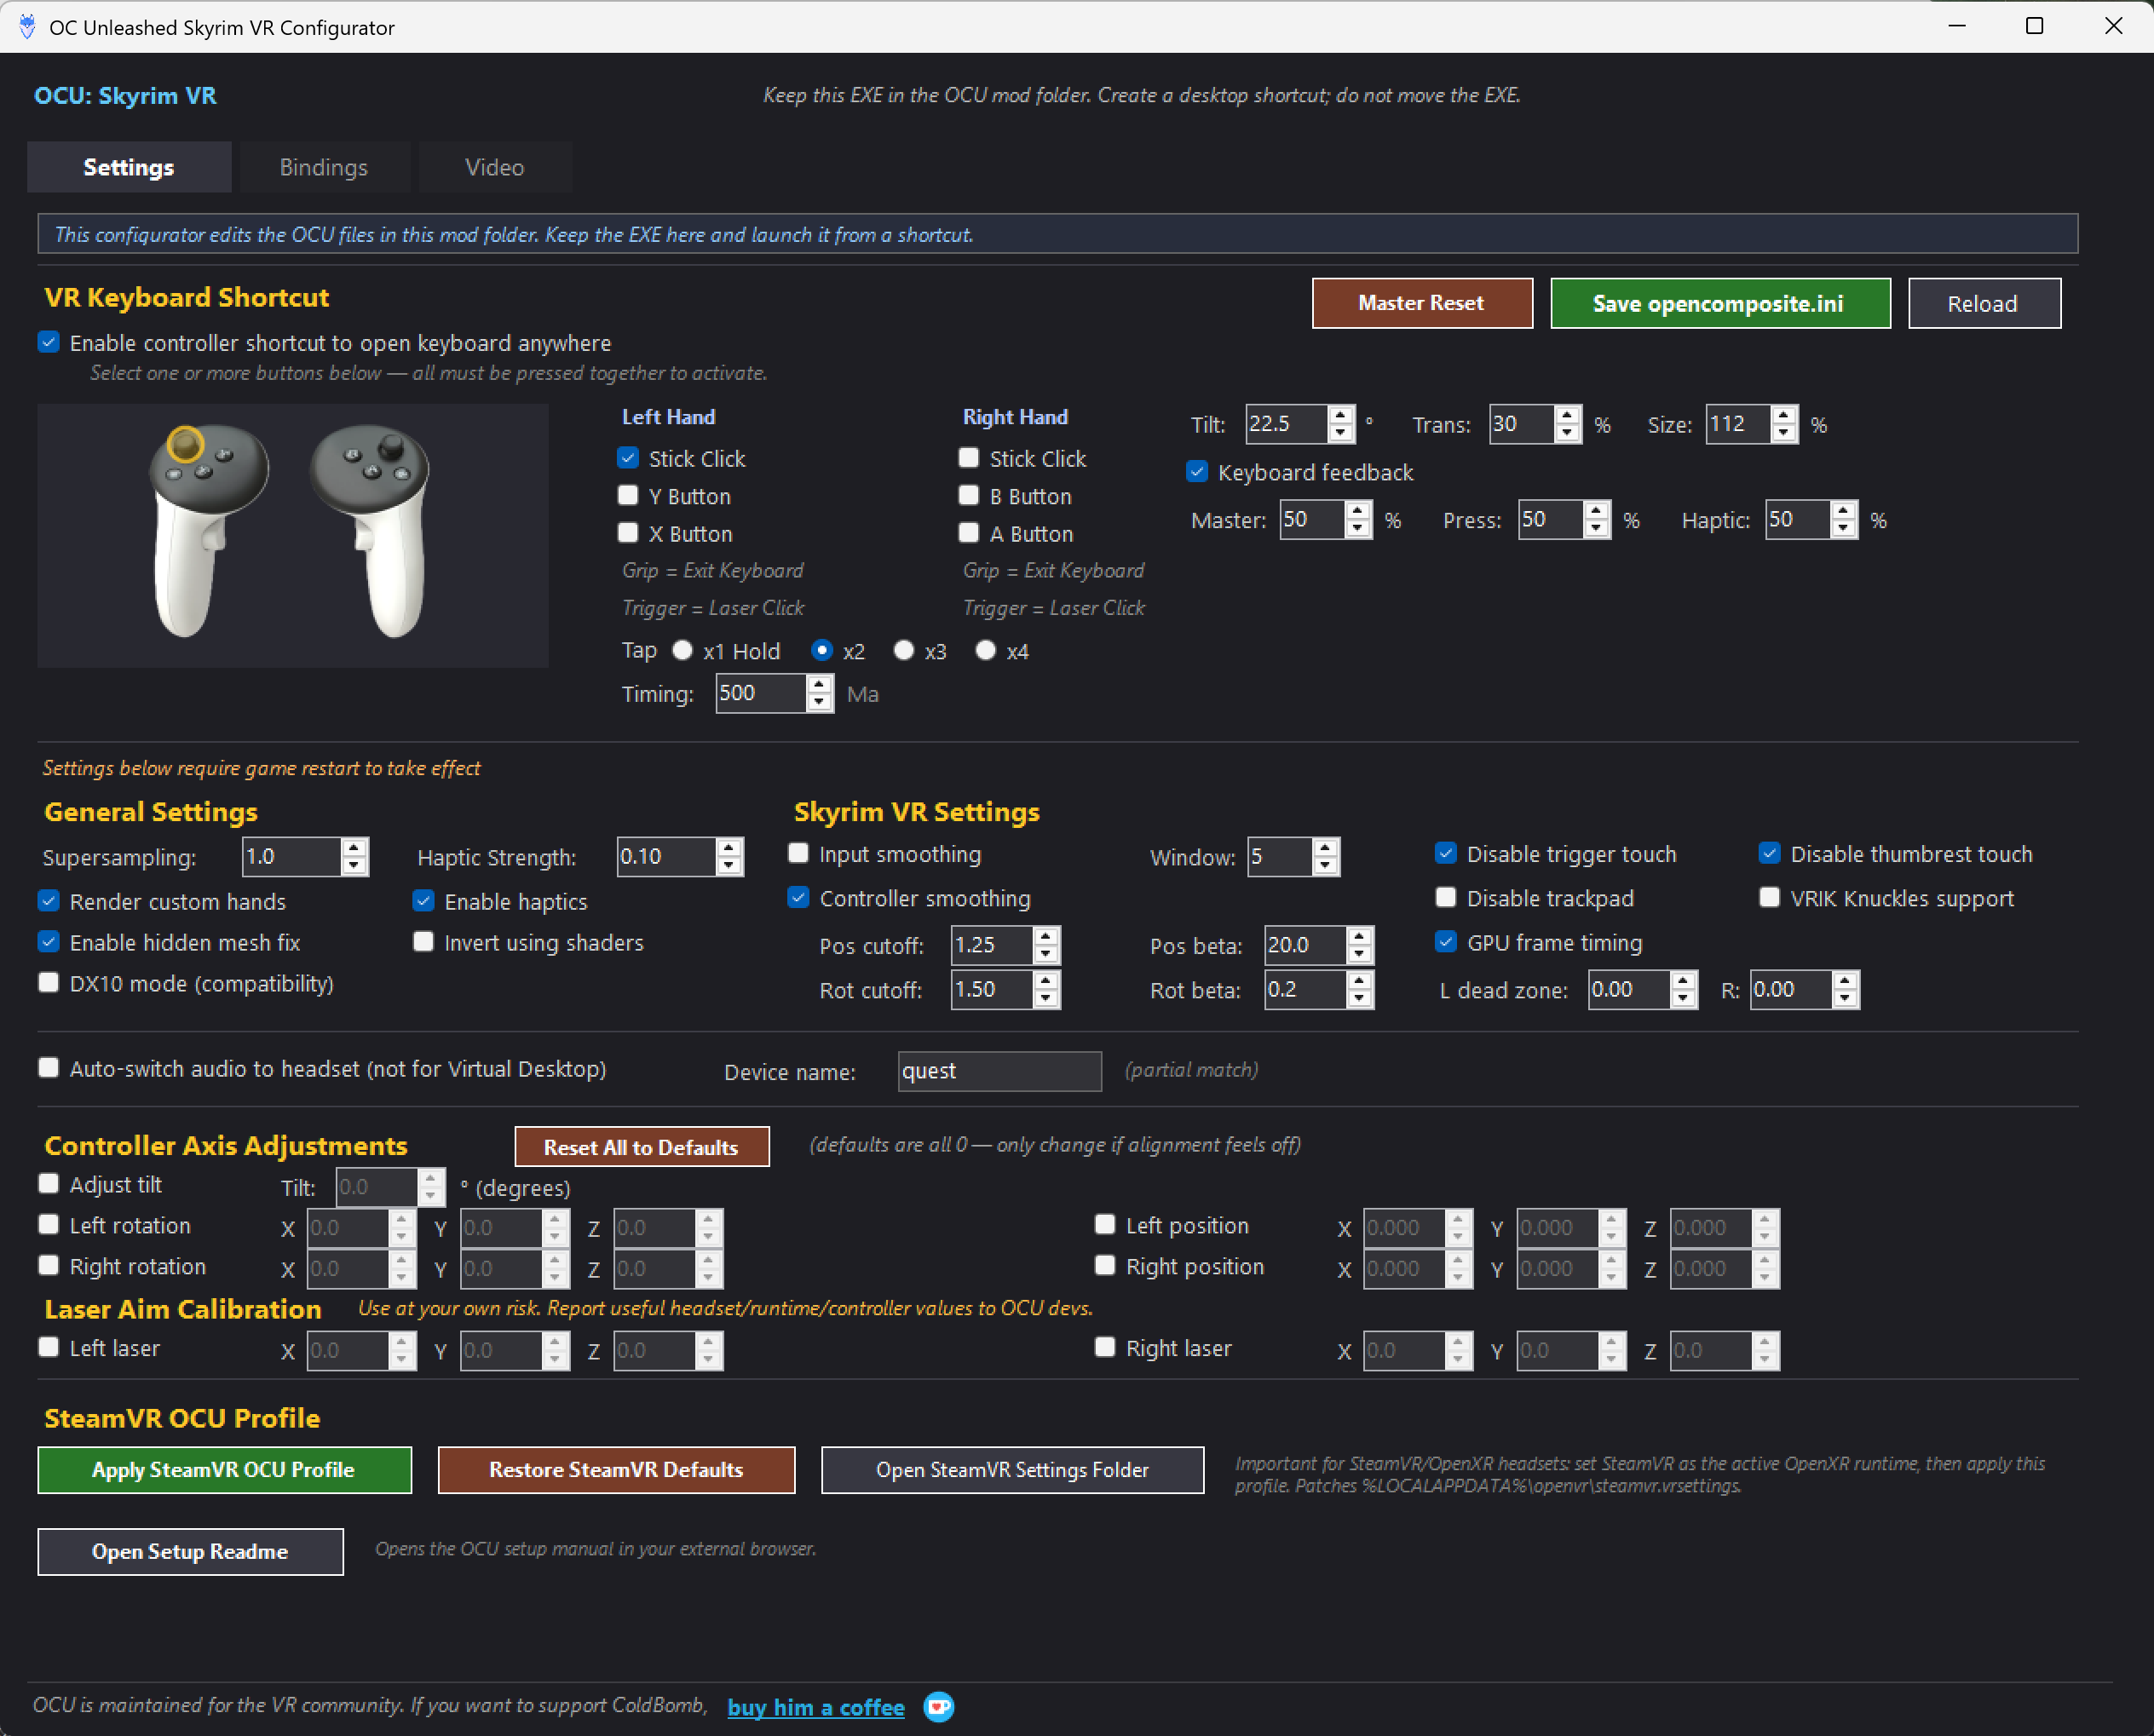
Before getting to the fun stuff, you need to choose the right runtime. Under the hood, OCU changes how Skyrim VR reaches your headset.1 OpenXR is the vendor-neutral standard that most headsets speak natively, which is exactly why skipping the SteamVR detour can run leaner for those headsets. (For SteamVR-native headsets, the benefits come from skipping the actual SteamVR app and from OCU’s other features.)
Which OpenXR runtime OCU should hand the game off to depends on your headset:
- Standalone headsets (Quest, Pico, Dream MR, etc.) with Virtual Desktop: use VDXR (see below).
- Quest over a wired Link or Air Link: you’re probably already using the Oculus (Meta) OpenXR runtime and don’t need to do anything.
- Pimax: set “Pimax OpenXR as your default runtime in the Pimax Play settings.
- SteamVR-native headsets (Valve Index, Bigscreen Beyond, and the like): use SteamVR’s own OpenXR runtime (see below).
If you juggle multiple headsets, you can use XR Picker to switch the active OpenXR runtime between them.
Virtual Desktop
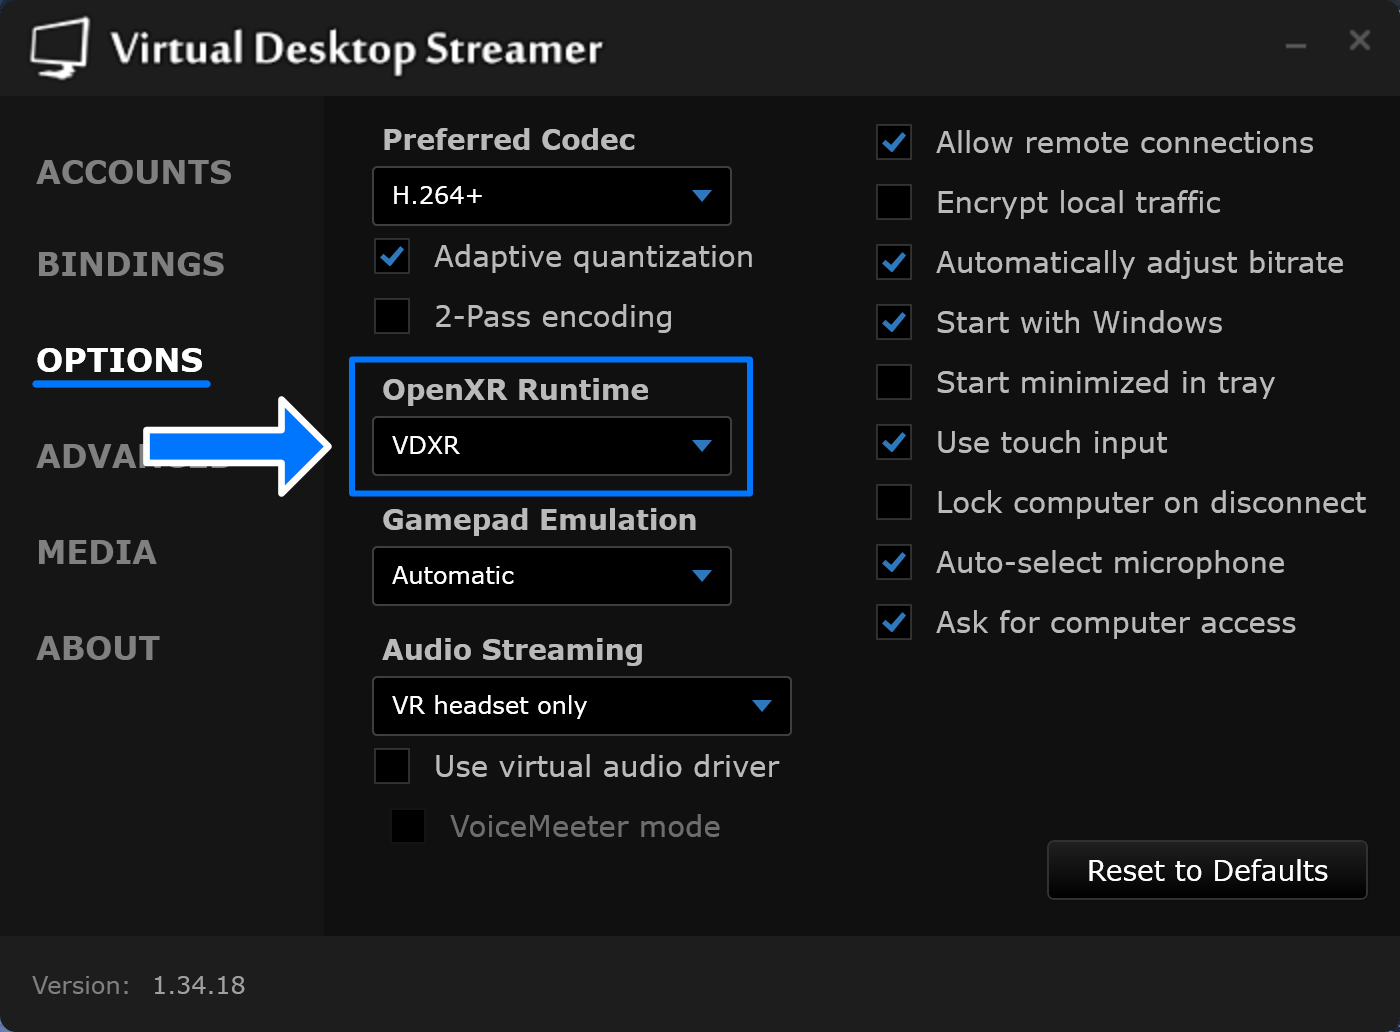
Setting the runtime in Virtual Desktop. If you play on a Quest (or another wireless headset) over Virtual Desktop, the runtime setting lives in the Streamer app on your PC—not in the game, and not in the headset’s settings.
- Open the Virtual Desktop Streamer app on your PC.
- Find the OpenXR Runtime setting in the OPTIONS tab.
- Set it to VDXR .
Whatever you do, don’t pick SteamVR here. On Virtual Desktop, VDXR is the runtime you want.
Virtual Desktop audio
SteamVR
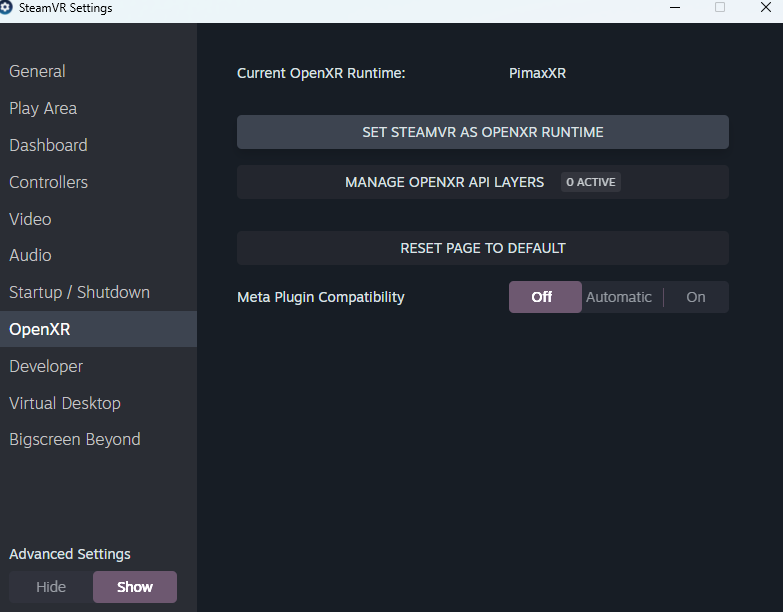
Setting the runtime in SteamVR. If you’re on a wired SteamVR-native headset (a Valve Index, Bigscreen Beyond, and the like), you’ll point OpenXR at SteamVR and then apply a profile that tunes SteamVR for OCU.
- Open SteamVR Settings → OpenXR .
- If SteamVR isn’t already the active runtime, click Set SteamVR as OpenXR Runtime .
- In the Configurator, apply the SteamVR OCU Profile (pictured below).
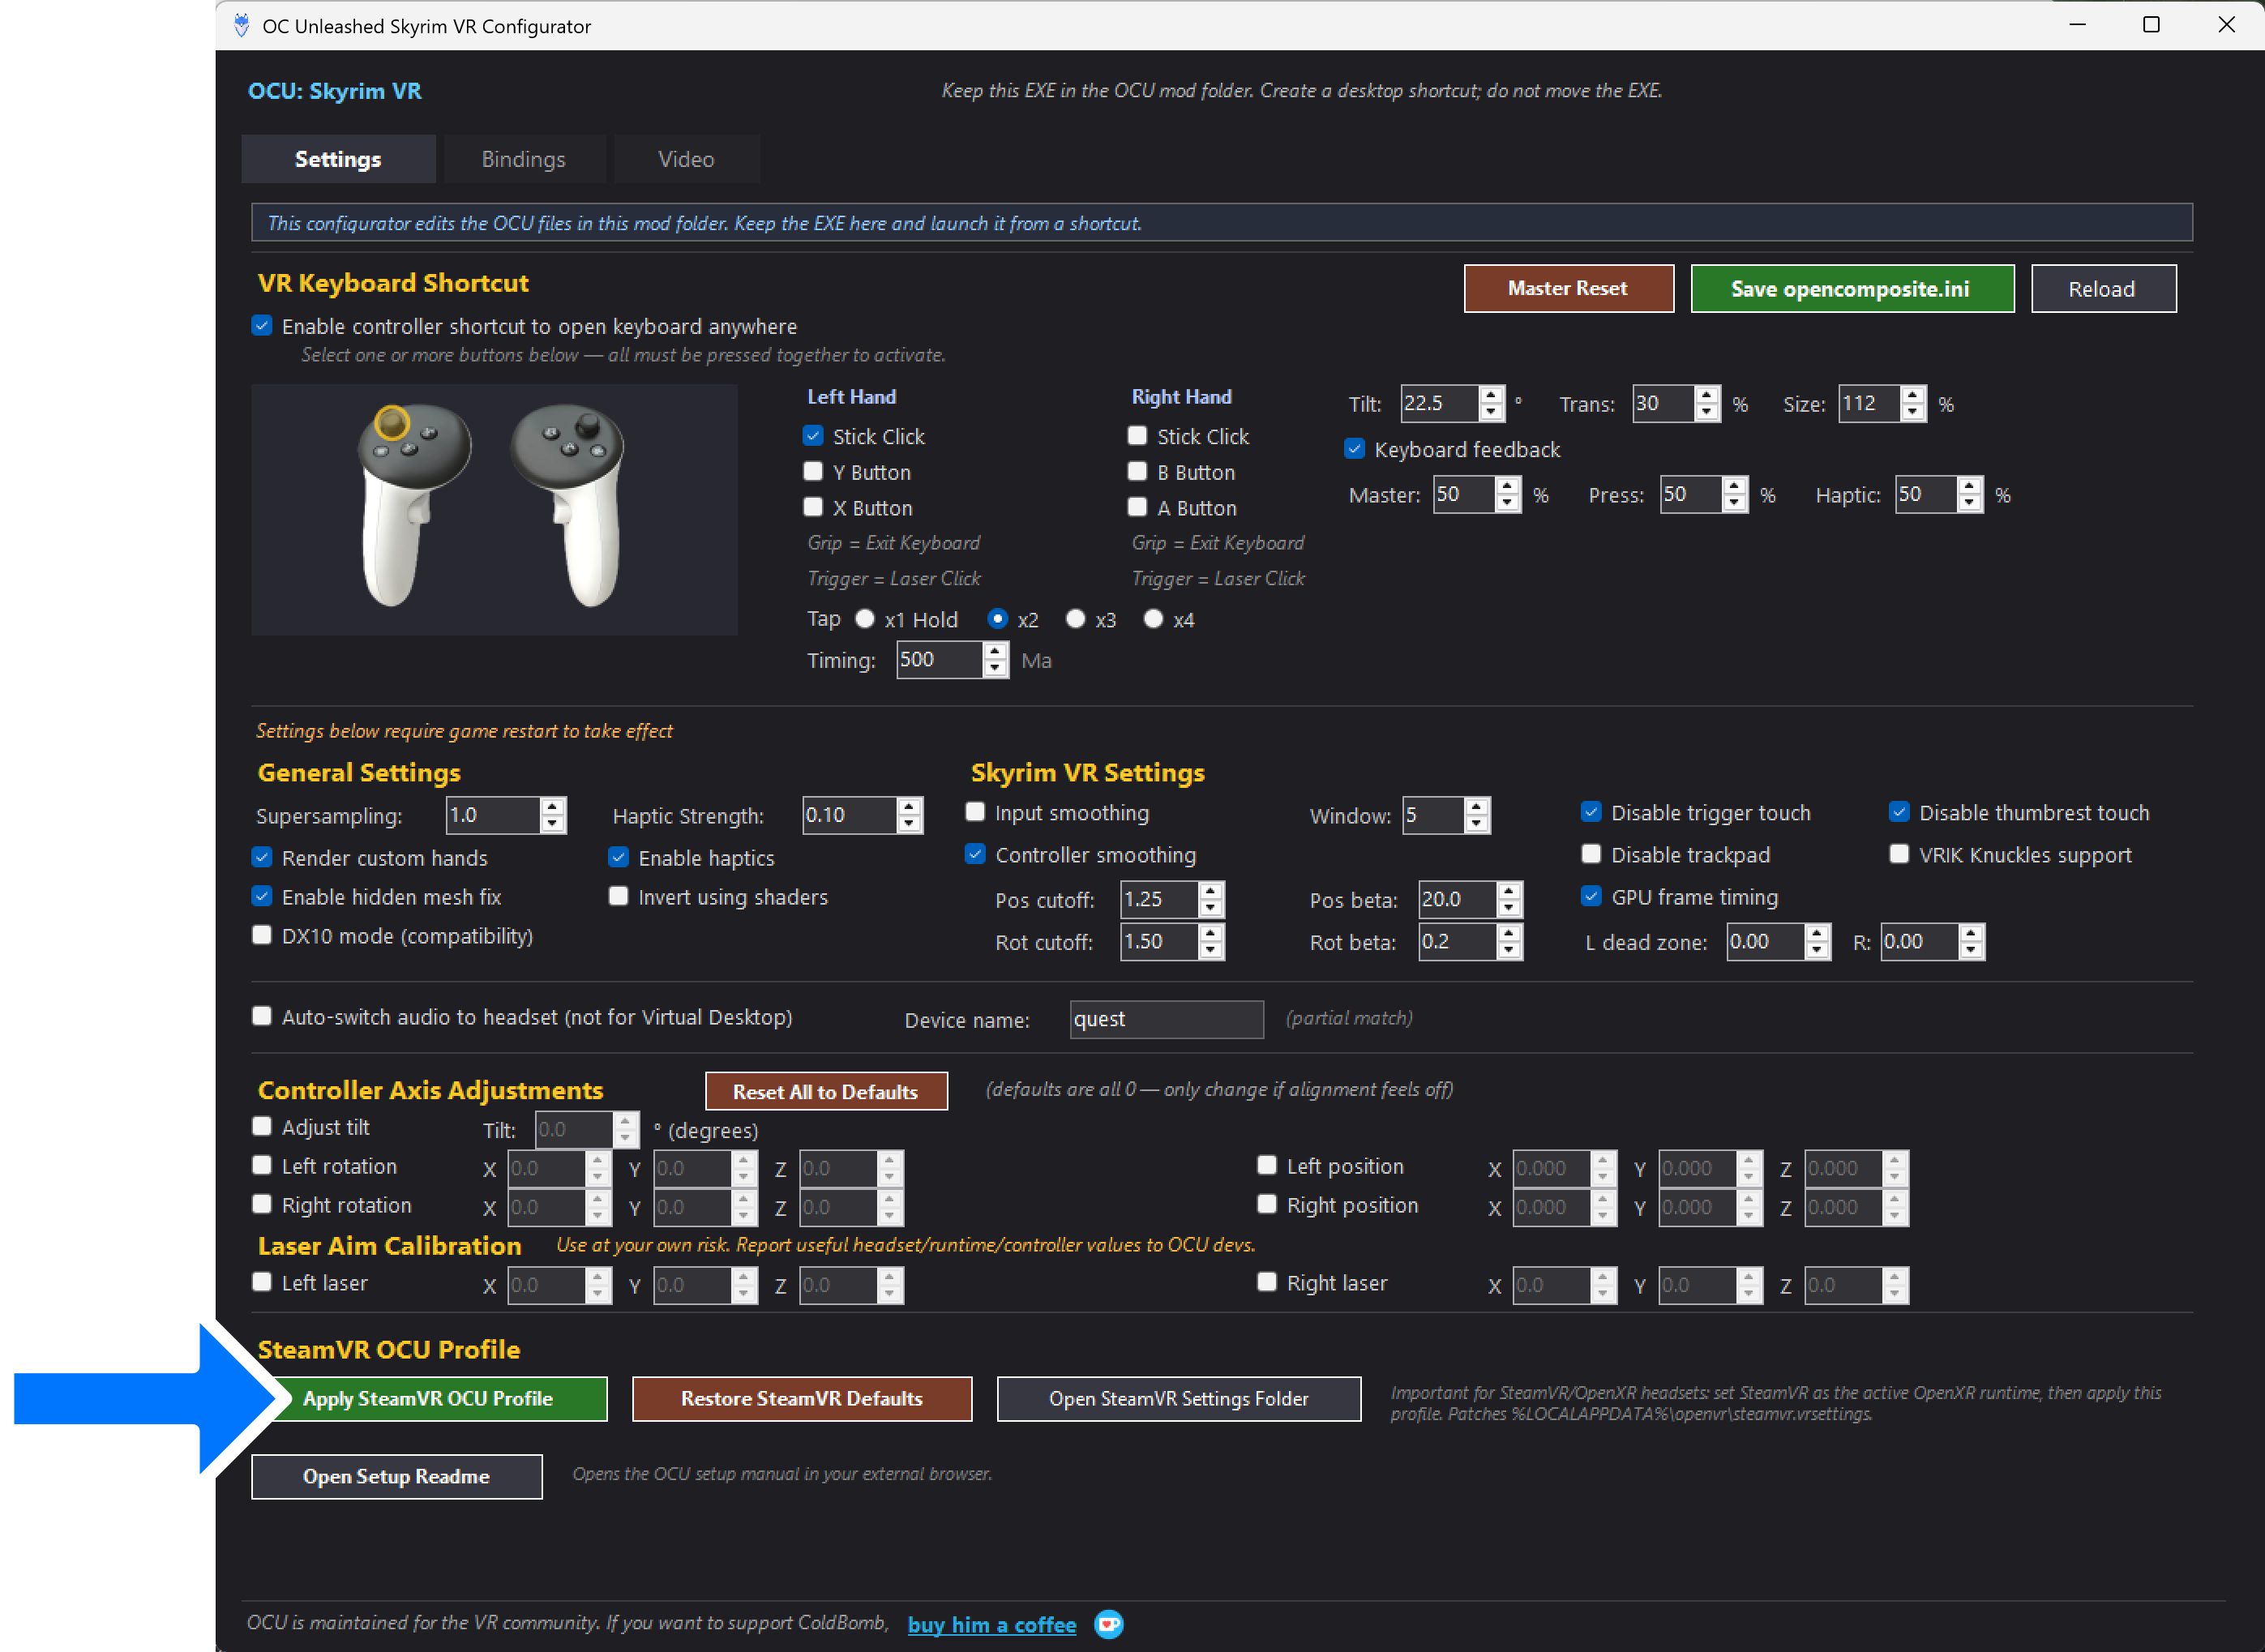
Don't skip the OCU Profile
OCU Features
On-Screen Keyboard
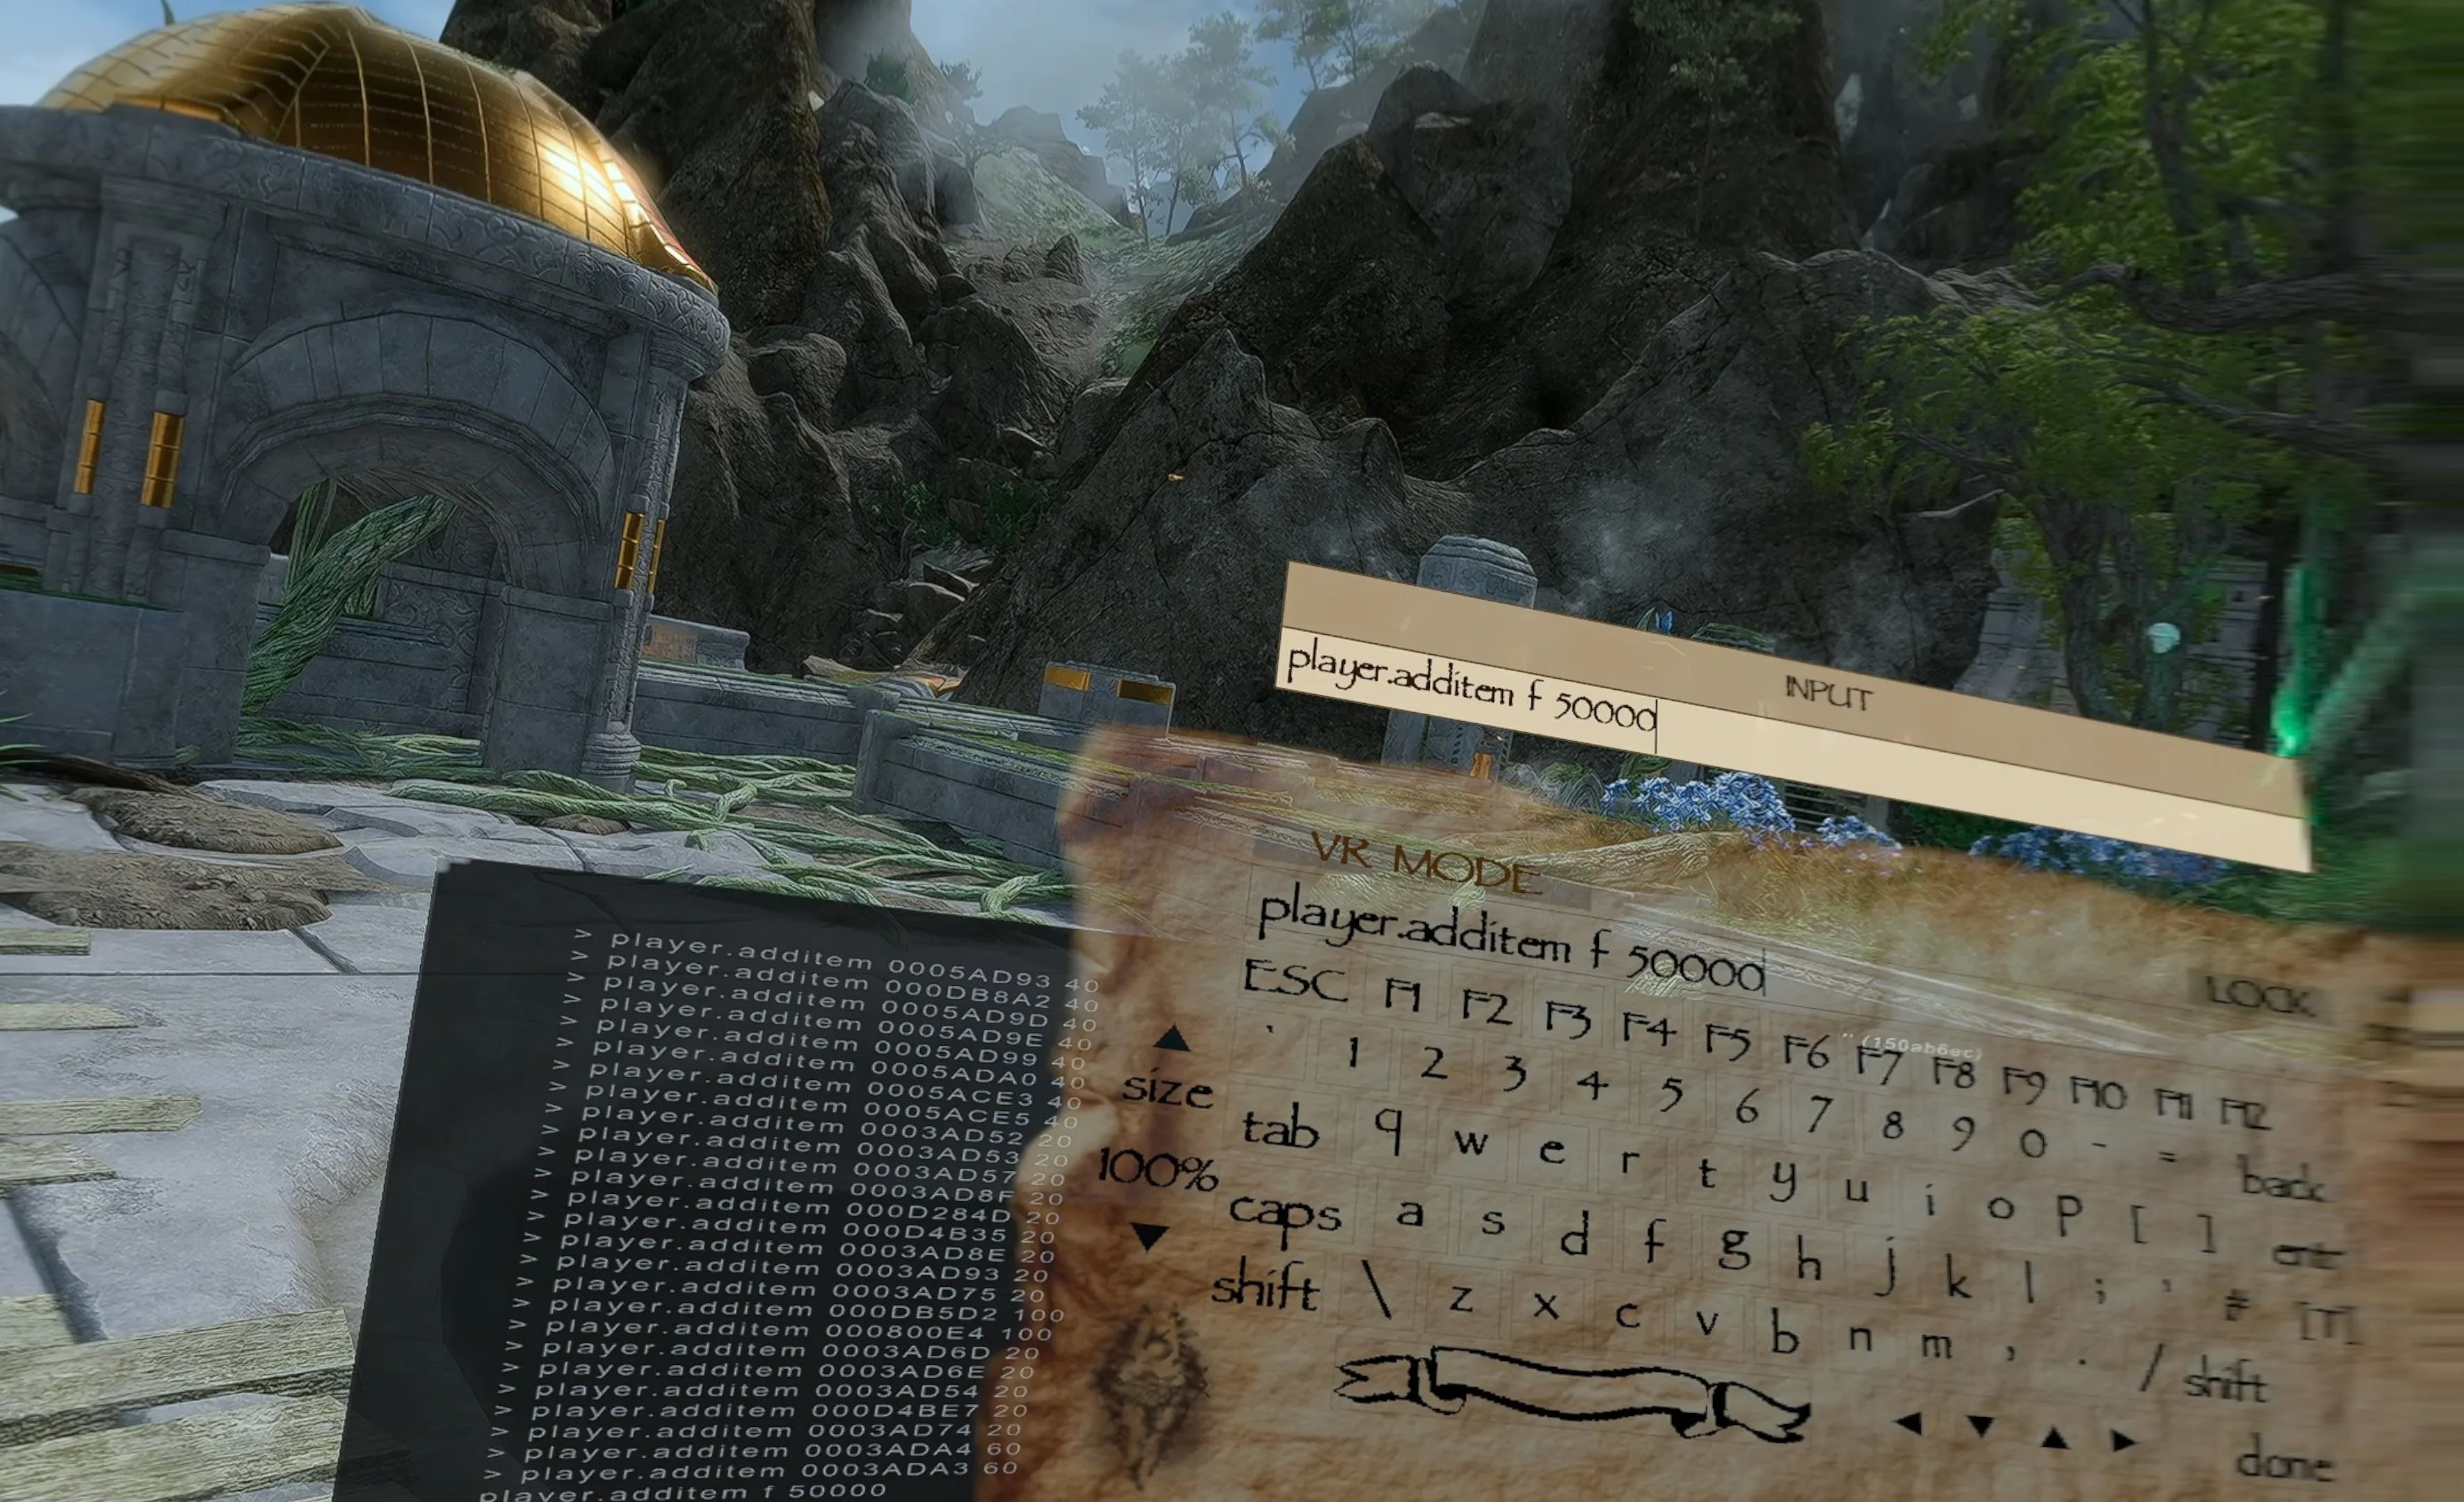
An on-screen keyboard was OCU’s original signature feature and is what motivated Wondernutts to start the project. SteamVR has its own keyboard, but OpenComposite doesn’t, and even hardware keyboards don’t work in-game. So to name your character and the items that you forge/enchant/brew, you’ll need OpenComposite Unleashed. It also saves you from needing to switch to the desktop view to use the console.
The keyboard will open automatically when it’s time to name your character or an item. You can open it manually using an assigned button or button combo, defined in the Configurator. By default, it’s set to
Double-Click  Left stick
.
Left stick
.
You can close the keyboard by squeezing  Grip on either controller.
Console Woes
If you open the console and then hide the keyboard using the
Done
button instead of Grip before closing the console, your console state will be out of sync with OCU, and it can get confusing. If that happens, open the keyboard back up, close the console with `, and close the keyboard with
Done
.
This might seem weirdly specific, but I’ve put these instructions here because I’ve done it about a dozen times. I can’t be the only one.
Controller Bindings
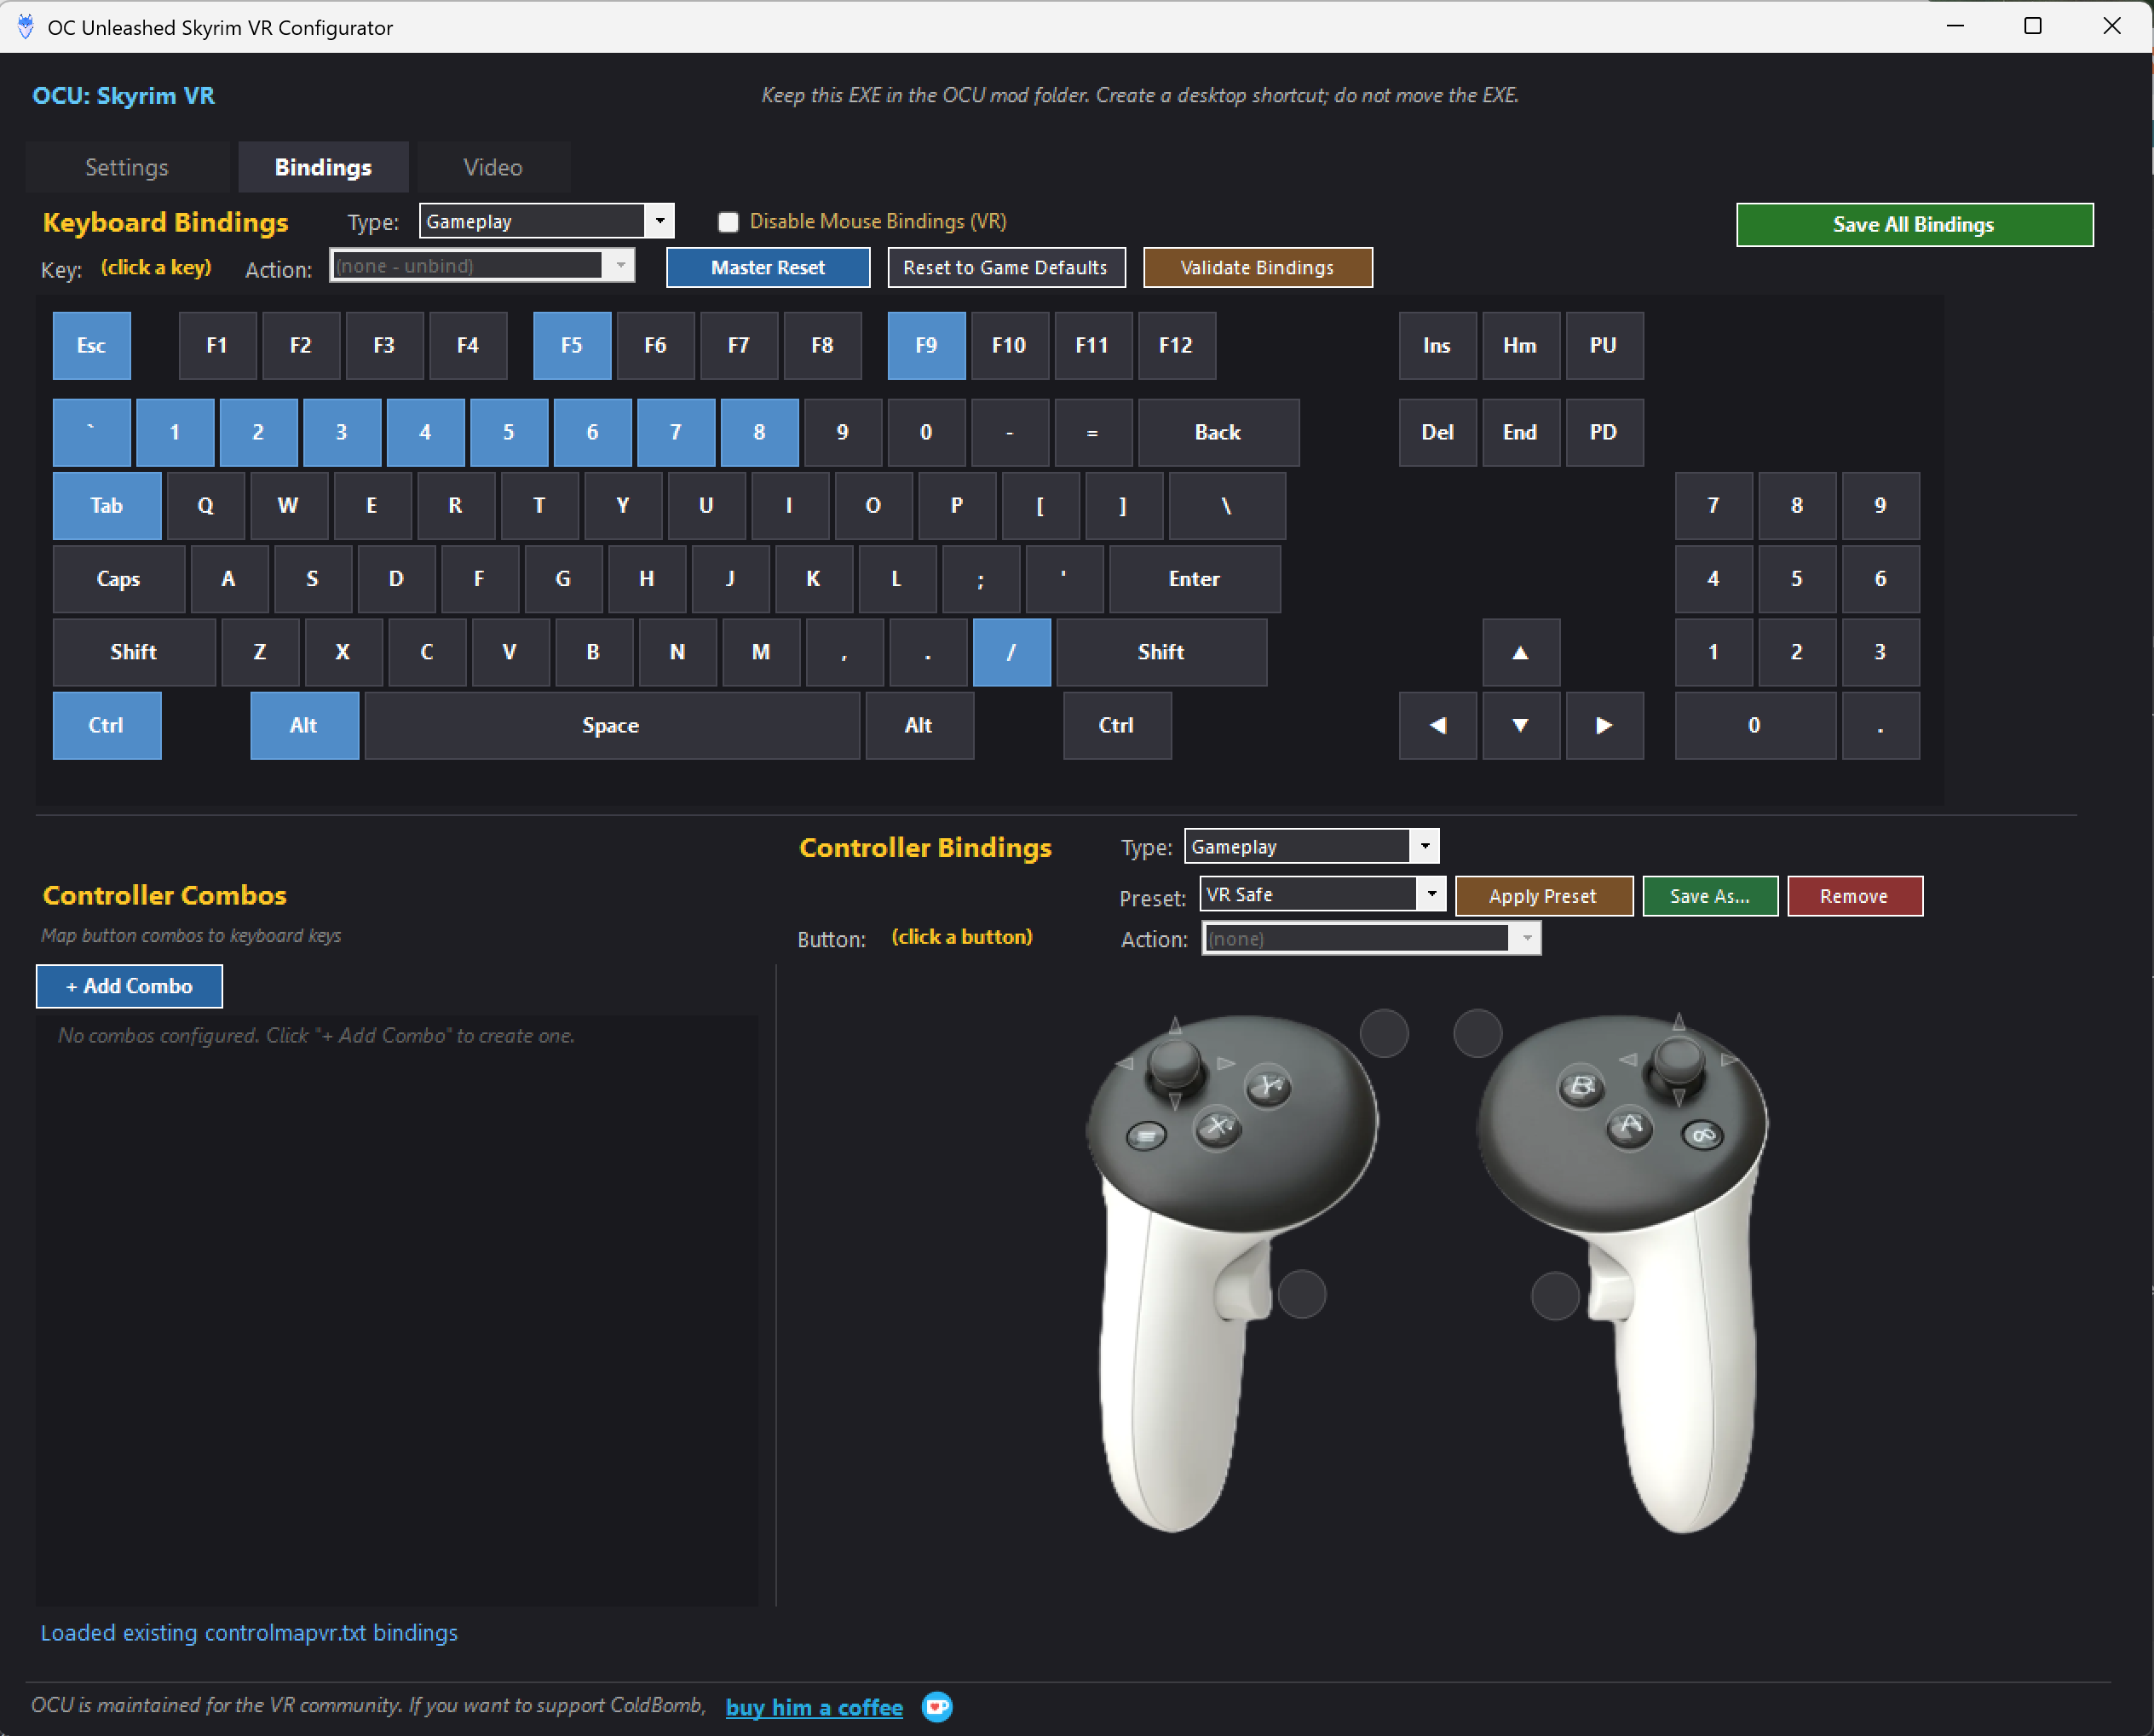
Skyrim VR gives you no in-game way to customize its controls. Your only options are to edit an esoteric text file by hand or to install a mod. The Configurator does it, and it’s one of the best solutions out there.
But: OCU has to be the only thing managing your bindings.
Let OCU own your bindings
Happily, OCU ships with several presets, and a few of them have their own pages here with a full button-by-button breakdown:
- Kvite : the default and the best starting point for most players, a community favorite from FUS (Kvite Bindings)
- Cangar , another favorite from FUS (Cangar Bindings)
- VRIK V2.1.0 , which was the default in earlier versions of MGO (VRIK Bindings)
- VR Safe : which restores the original VRIK layout alongside the original keyboard layout (VR Safe Bindings), in case you goof up your keyboard bindings somewhere along the way
- Vanilla + Oculus Touch , a hotkey-heavy layout that’s closer to VRIK than to vanilla, despite the name (Optimized Oculus Bindings)
There’s also a plain Vanilla preset if you want Skyrim VR’s baseline layout. Whichever you choose, apply it, save your bindings, and restart the game to test it before you start tweaking anything.
Roll your own combos
Grip +  A +
A +  B combo won’t get eaten by a simpler Grip + A one.
Video/Performance
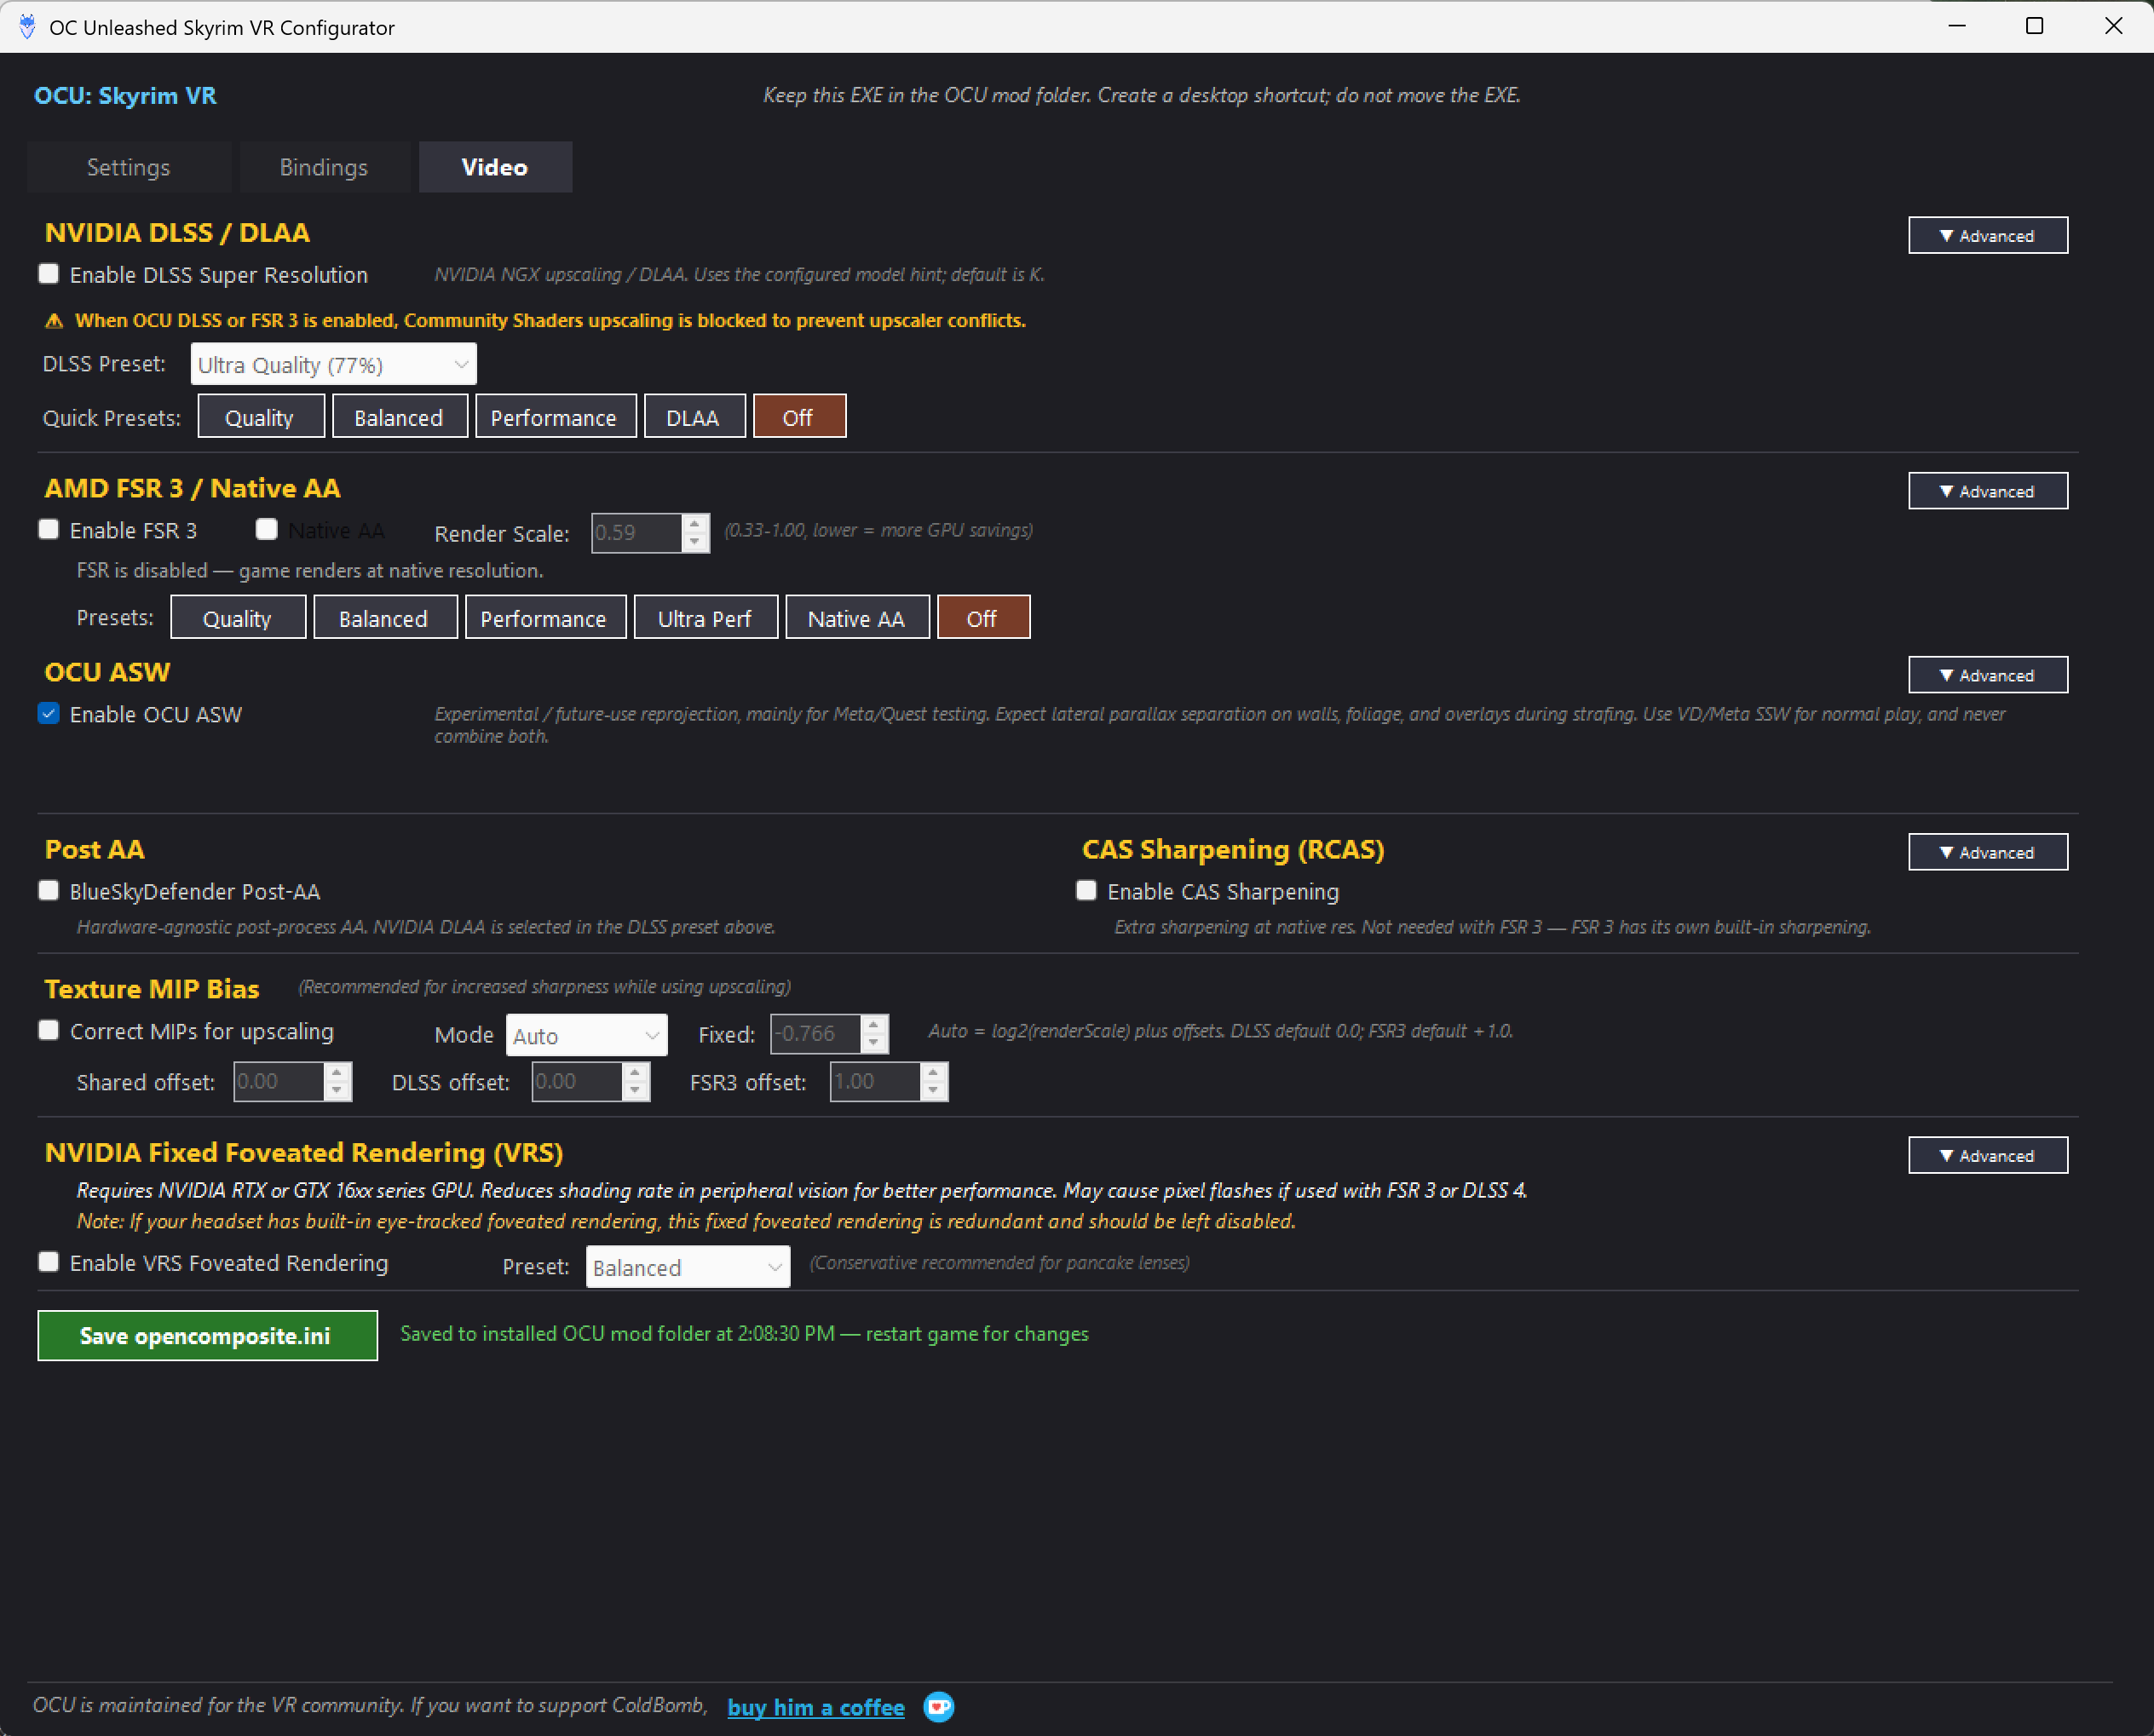
The Configurator exposes a number of performance-tuning tools for both NVIDIA and AMD cards. There are multiple options for upscaling, which renders the game at a lower resolution and intelligently scales it up, buying you frames without turning everything into mush. You can enable FSR (AMD’s FidelityFX Super Resolution, which works on any GPU) or DLSS (NVIDIA only). NVIDIA users also get Fixed Foveated Rendering, which saves work by rendering the edges of your view (where your eyes generally aren’t focused, though this feature does not include eye-tracking) at lower detail.
Pick one upscaler
The Configurator also offers ASW (Asynchronous SpaceWarp), a frame-generation technique that smooths motion by inserting synthetic frames between the real ones. ASW runs on your PC, not your headset.
Choose a SpaceWarp
Normally the chain is Skyrim VR → SteamVR . With OCU, it becomes Skyrim VR → OCU → your OpenXR runtime . ↩︎